Tag Archives: how to do

DIY – Baby aviator Palm sunday candle


IMG_4599Sometimes when you have a baby (who is not able to hold his candle on his own), you found yourself hesitating whether you get him a decorated candle or no. Personally i do encourage having one, if you choose a smaller size candle with convenient decorations. When your baby is 3 months+  it’s possible he can keep a firm hold of it, with your help. I did it but without lighting the candle, he really enjoyed it!

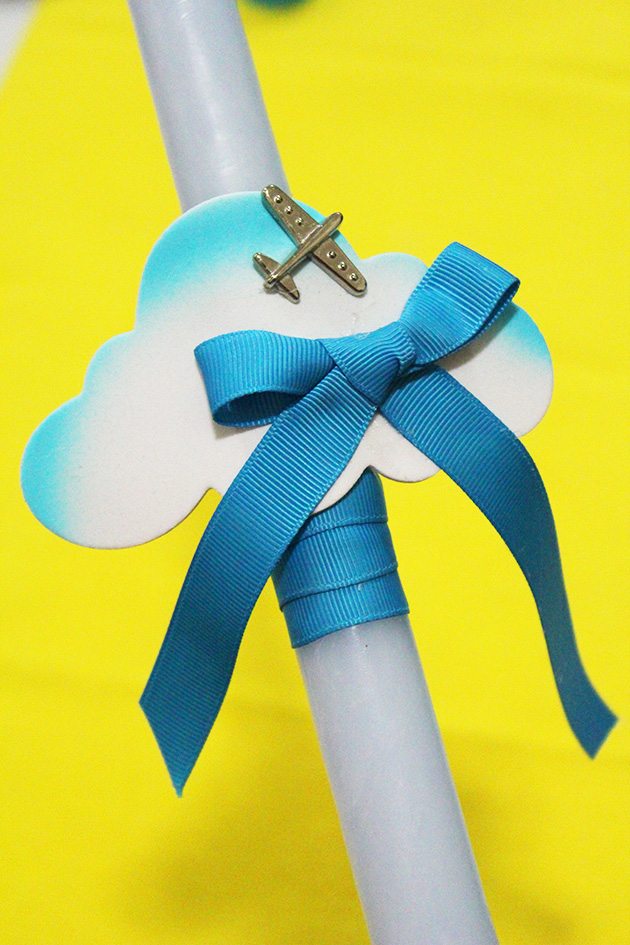
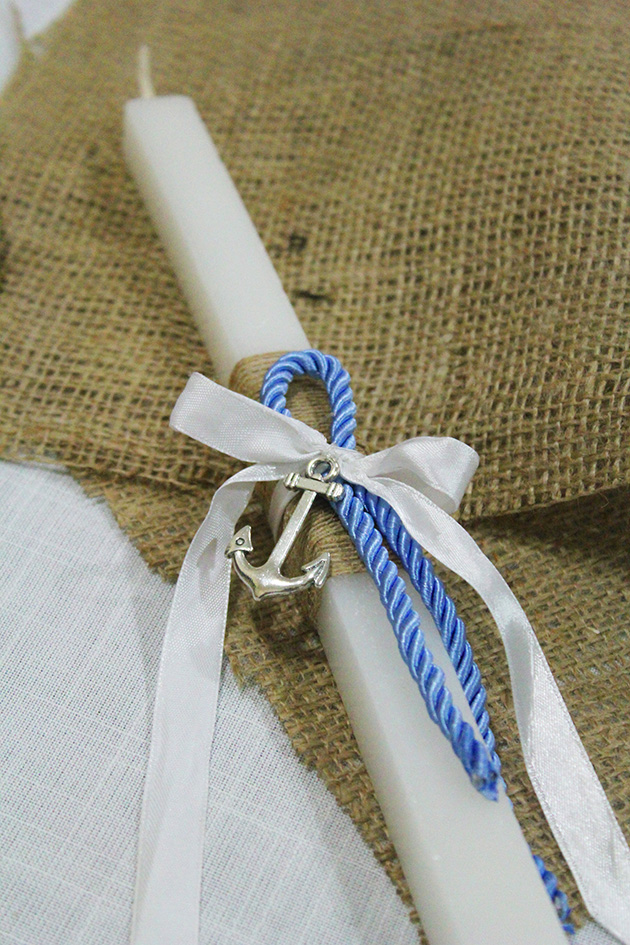
If you are willing to do one, follow the step by step tutorial for a baby aviator Palm Sunday candle:

how to do plane palm sunday candle

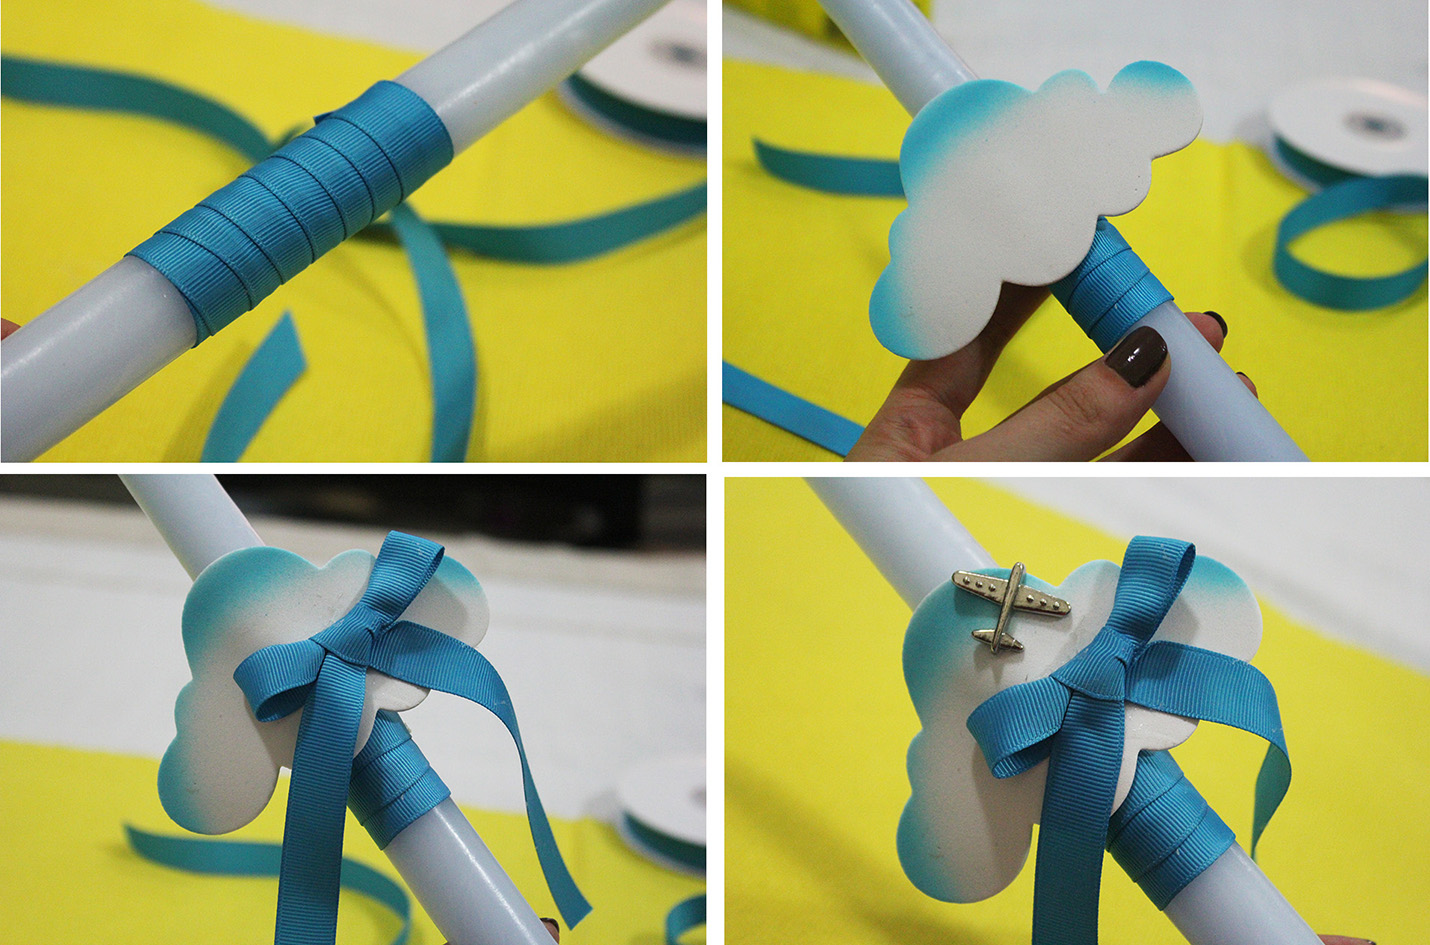
  • Wrap a blue ribbon around the candle you choose. I used a baby blue one
  • Stick a cut out cloud (foam) on the ribbon
  • Make a bow of the same blue ribbon and stick it on the cloud
  • Metal, wood or even paper plane look beautiful on the cloud, direction up as if flying

It’s a very easy craft, It doesn’t require too much skills and the outcome is amazing. When you DIY something for your kids, it holds lots of love and memories and It means a lot to your kids as well, they will remember it for a long time!

IMG_4596If you like this post give it some likes and shares to spread the joy. Don’t forget to like marmite et ponpon facebook page and follow on twitter. More posts yet to come, stay tuned!

DIY Palm Sunday candle – nautical theme


IMG_4542The most beautiful things in life are found in the simple!

Make your kid a unique Palm Sunday candle, done with love and in less than 10 minutes. All you need is a candle, piece of burlap, white ribbon, blue rope and a nautical motif, could be anchor, ship helm or even fish…

Follow this step by step tutorial:

how to do

  • Wrap the burlap ribbon (7-8cm width) around the candle, almost at the 1/3, so it’s above your kid hand grip.
  • Fold a piece of 20 cm rope( could be blue, red, beige….) and attach it to the candle with a thin white ribbon.
  • Hang the nautical motif you chose, at the center of the white ribbon

And that’s it! I told you it’s a less than 10 minutes craft.

IMG_4545You can adapt it to any color of your choice, related to the nautical concept and matching your kid cloths if you wish so. Boy or girl can enjoy this candle depending on the colors you use.

If you like this post give it some likes and shares to spread the joy. Don’t forget to like marmite et ponpon facebook page and follow on twitter. More posts yet to come, stay tuned!

Caramel date energy balls


caramel date energy ballsCaramel date energy balls are the kind of grab and go snack you need to munch on to get the fuel needed for busy days.

Those little energy bites are also perfect for your little ones. They will love it! My son is not sweets lover, but he really liked them. I was pleased to see him eating this nutritious healthy snack. Don’t hesitate to insert some in your kids lunchbox to school, it helps staying energetic all day long!

caramel date energy ballsIngredients: (yield 25 balls)

  • 250g date pitted and chopped
  • 100g butter
  • 60g sugar (4 tbsp)
  • 100g biscuit marie crushed

caramel date energy balls

Heat the butter and sugar until caramelized and golden, about 4-5 minutes. Add the date and cook until combined and smooth. Remove from the heat and add the biscuits. Mix well to form kind of dough. Roll them in balls, let it cool and enjoy!

caramel date energy ballsThose addictive treats will fill your mouth and warm your heart with their flavorful taste. It’s hard to stop yourself when eating! Once you start you can never stop, trust me, you will find yourself eating one after the other!

You can keep them up to 2 weeks in a closed container, but who will anyways?!

caramel date energy ballsSatisfy your sweet tooth, don’t restrain yourself from eating what you like, respecting the golden rule of moderation. Bite and enjoy!

caramel date energy ballsIf you like this post give it some likes and shares to spread the joy. Don’t forget to like marmite et ponpon facebook page and follow on twitter. More posts yet to come, stay tuned!

Apple braid puff


IMG_4340Following the pear tart  i made two weeks ago, i found myself exploring more fillings for the puff pastry. Having the dough ready made (knowing that It’s not difficult to make at all, but time consuming), It doesn’t need too much pastry skills, it just takes someone who loves “les viennoiseries”.

This apple braid is the kind of sweet that i like albeit not too sweet. The combination apple cinnamon has it all!

IMG_4353To make this braid you need:

  • 400g puff pastry
  • 2 red apples (gala), core removed, washed and sliced
  • 2 tbsp brown sugar
  • 1 tsp vanilla
  • 1 tbsp cinnamon (or more, to taste)
  • 1 egg, beaten, for egg wash
  • granulated sugar, for sprinkling

Mix apple with sugar, vanilla and cinnamon and set aside. Preheat oven to 180°C.

how to do

Roll the pastry dough into a 30 cm x 30 cm square. Lightly divide it (without cutting) into 3 equal rectangles. Using a rotary cutter or simply the pizza cutter cut about eight strips, on the side rectangles. Leave the center rectangle intact. Remove the corner sections from each of the 4 corners strips.

Spread the apple cinnamon in the center section of the pastry. Fold the top flap down over the filling. Start by folding the top right strip over the filling slightly diagonal and press lightly to adhere. Then fold the top left stripe in the same manner. Repeat with the remaining strips until you reach the end, but before folding the last two strips make sure you folded the bottom flap.

Whisk the egg with one tbsp of cold water and brush the top of the braid then sprinkle with the sugar and bake for 20 mns or until golden and flaky.

IMG_4341This pretty braid is served any time of the day, for breakfast or dessert, warm or cold, with juice or even ice cream.

IMG_4354

IMG_4349If you like this post give it some likes and shares to spread the joy. Don’t forget to like marmite et ponpon facebook page and follow on twitter. More posts yet to come, stay tuned!

Decadent chocolate cake


IMG_4369If you think i am exaggerating when i say this is the best basic recipe for a chocolate cake, try it and prove me wrong! I am sure you will be checking this recipe over and over and over….

If you remember my spectacular chocolate cake with red fruits i did a year go, you will find that this is the same recipe of the chocolate cake, but this one with nutella butter frosting.

Trust me with or without frosting, ganache or fruits, it’s a staple chocolate cake for all the occasions and times.

IMG_4366

To bake the cake you need:

  • 2 cups flour
  • 1 1/2 cups sugar
  • 3/4 cup, unsweetened cocoa powder
  • 11/2 tsps baking soda
  • 1 tsp baking powder
  • Pinch of salt
  • 1 cup milk
  • 1/2 cup vegetable oil
  • 1 tsp vanilla essence
  • 1 1/2 tbsps instant coffee powder
  • 1 cup hot water
  • 2 large eggs

Preheat oven on 180ºC. In a large bowl, sieve the flour, cocoa powder, baking soda, baking powder and salt. Add the sugar and mix well with the dry ingredients.

Make a well in the center and add the milk, oil, vanilla essence and eggs then mix. Finally add the hot coffee melted in the cup of hot water.

Pour the cake batter into the prepared cake pan and bake for 40 mins or until a skewer comes out clean. Start checking from 35 mins onwards.

I should mention that my little baker helped me to prepare this cake!

my ittle baker

For the frosting you need:

  • 200g nutella
  • 200g butter
  • 1 cup icing sugar
  • 1 tsp vanilla
  • 1 pinch of salt
  • 1 tsp granulated sugar

Beat the butter until light and fluffy. Gradually add the icing sugar, then vanilla and pinch of salt and mix until combined.

Add nutella and beat until fluffy. When ready to use stir in the granulated sugar without over mixing, it will give you a light crunchiness effect later when savoring the cake.

I used 1M Wilton tip to create the swirls, and decorated it with some cherries. You can replace the cherry with strawberry or chocolate sprinkles if you want.

IMG_4368I put it couple of hours in the fridge before serving. But guess what?! the next day was even better!

IMG_4376

By the way, this was my birthday cake (last week) but i didn’t find the urge to post it, I was enjoying reading and over reading, everyday and many times for the whole week, the surprise post my husband did.

Again thank you babes for the beautiful unexpected surprise! Love xx

IMG_4383