Category Archives: way to play

Creative Easter eggs decoration -Dinosaurs land- DIY


IMG_4896
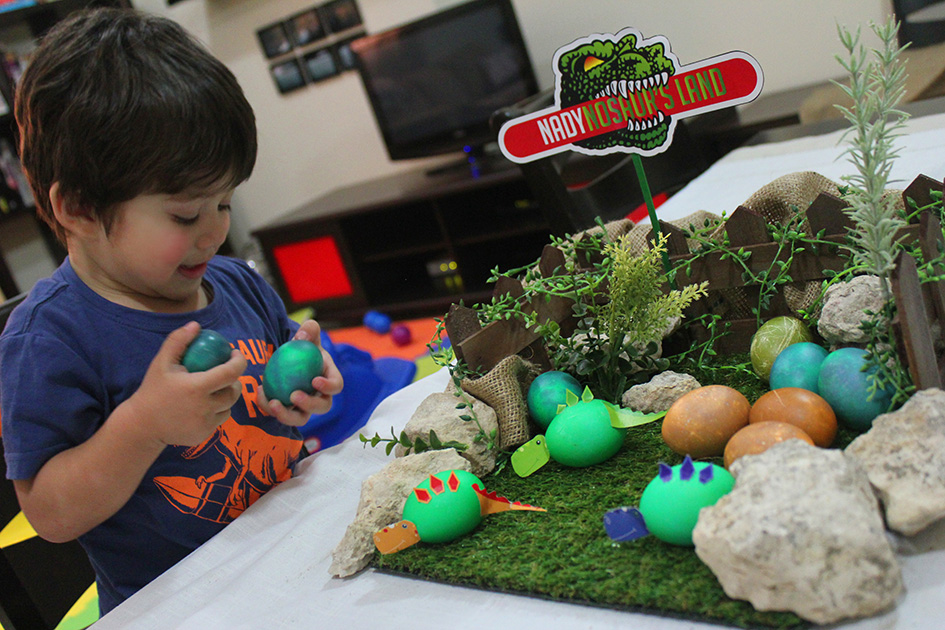
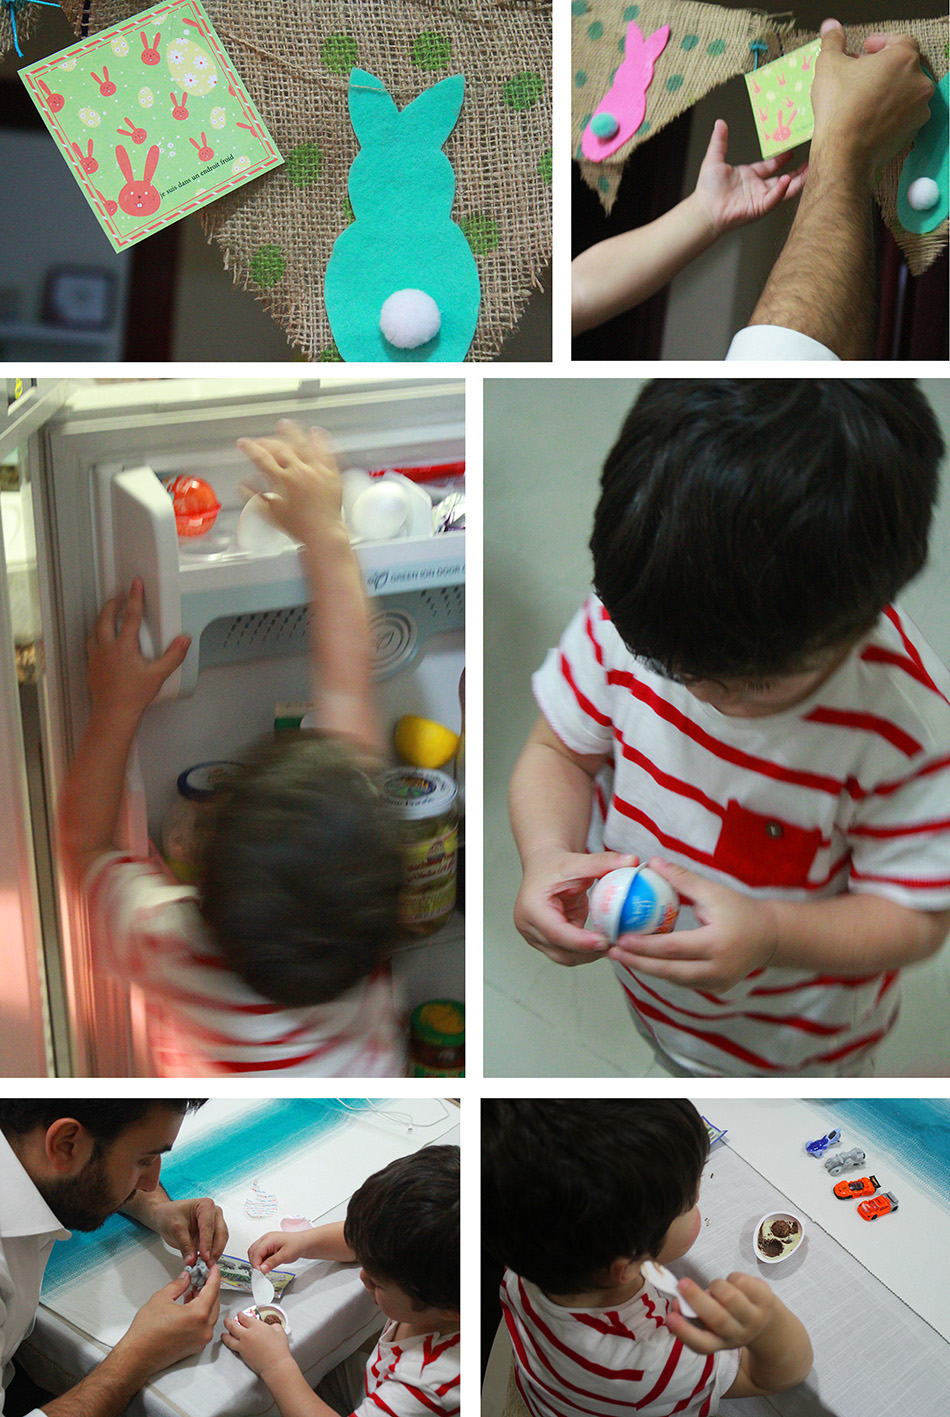
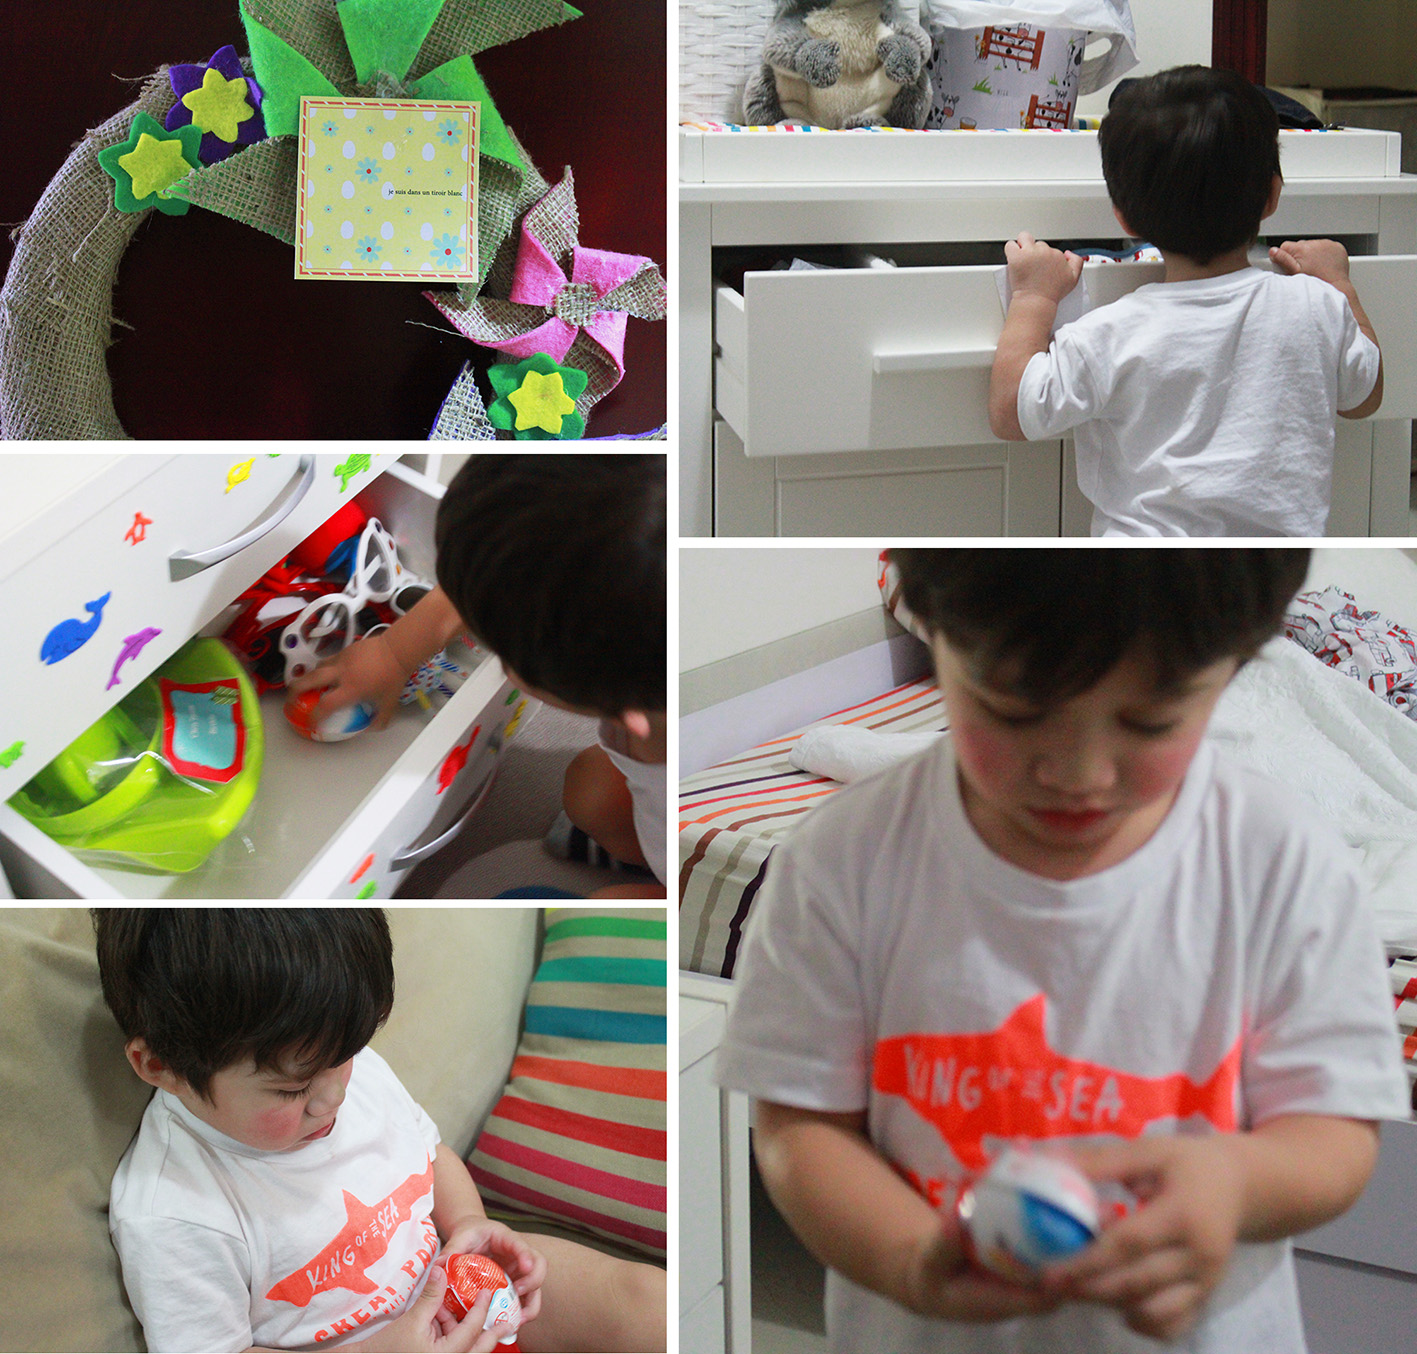
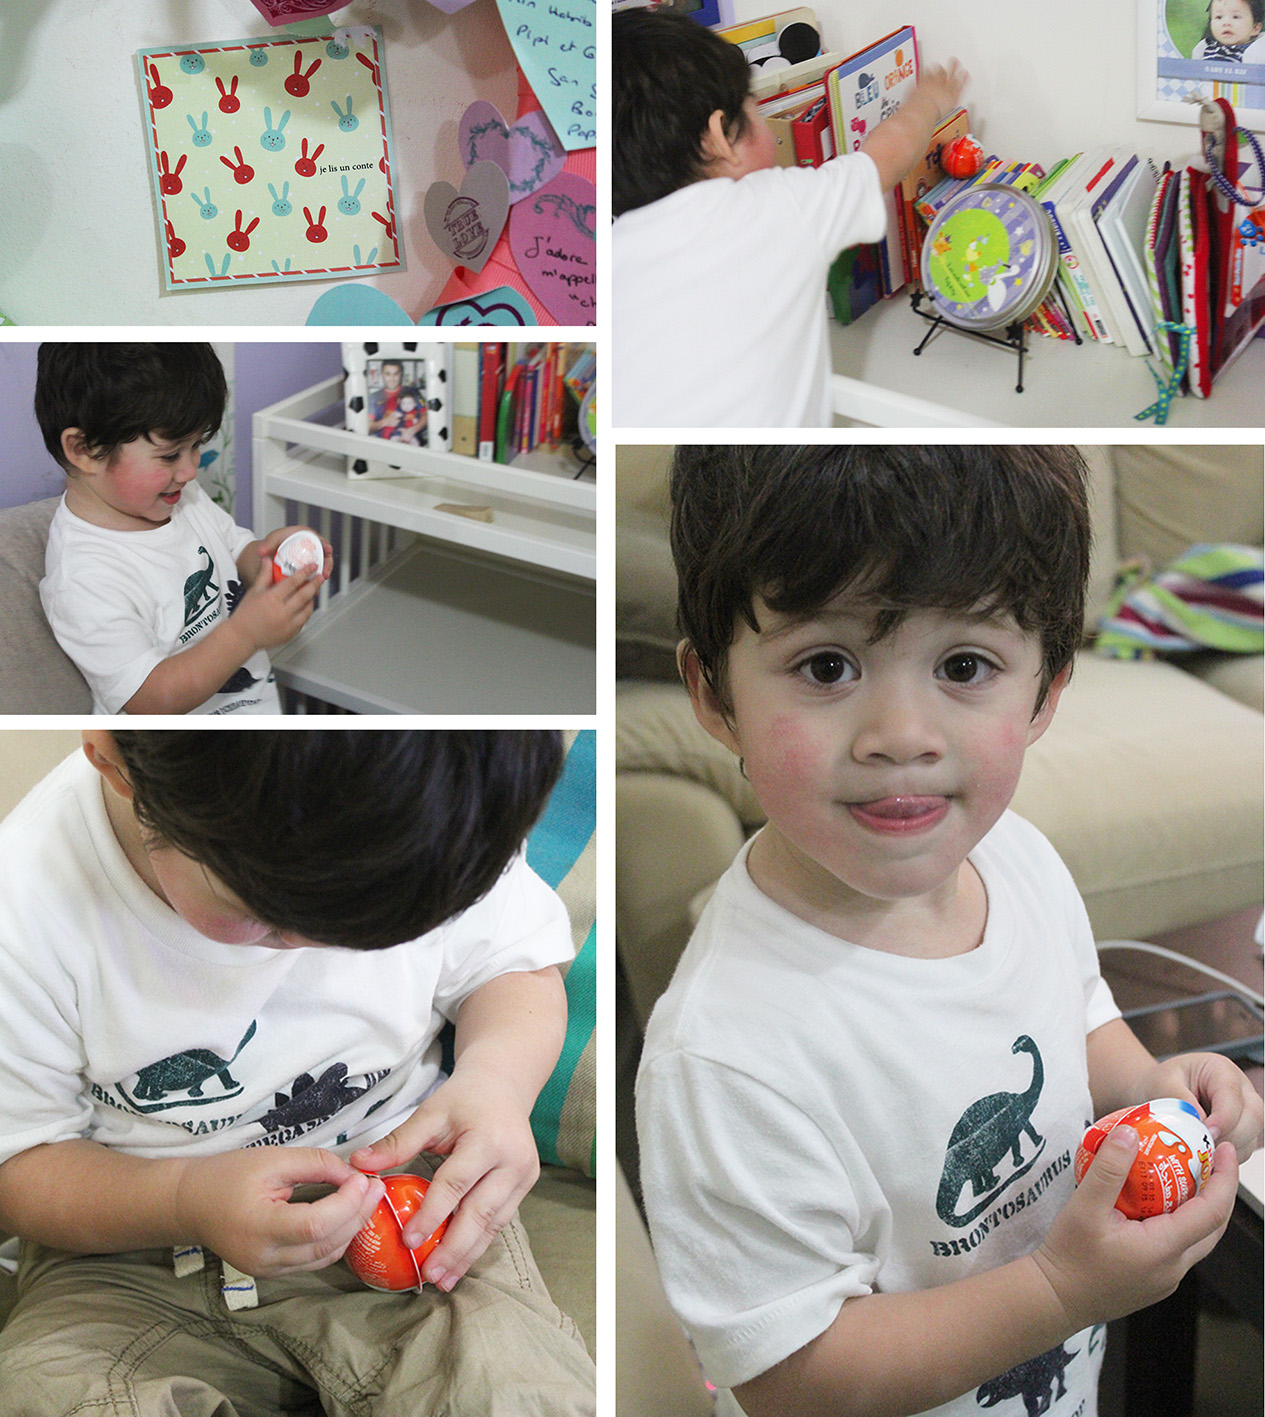
As i always say, my son is my source of inspiration. He is so much into dinosaurs lately, so a NADYnosaurs land is the perfect idea for this year’s Easter eggs.

As promised in previous post and If you’re willing to recreate this dino park, follow me step by step in this tutorial, it’s much easier than you think.

IMG_4801
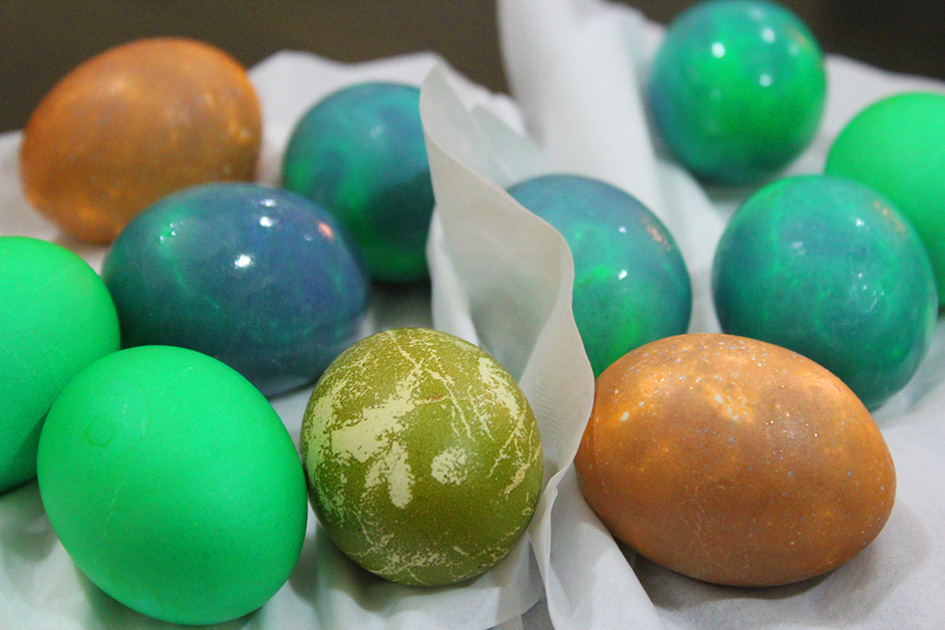
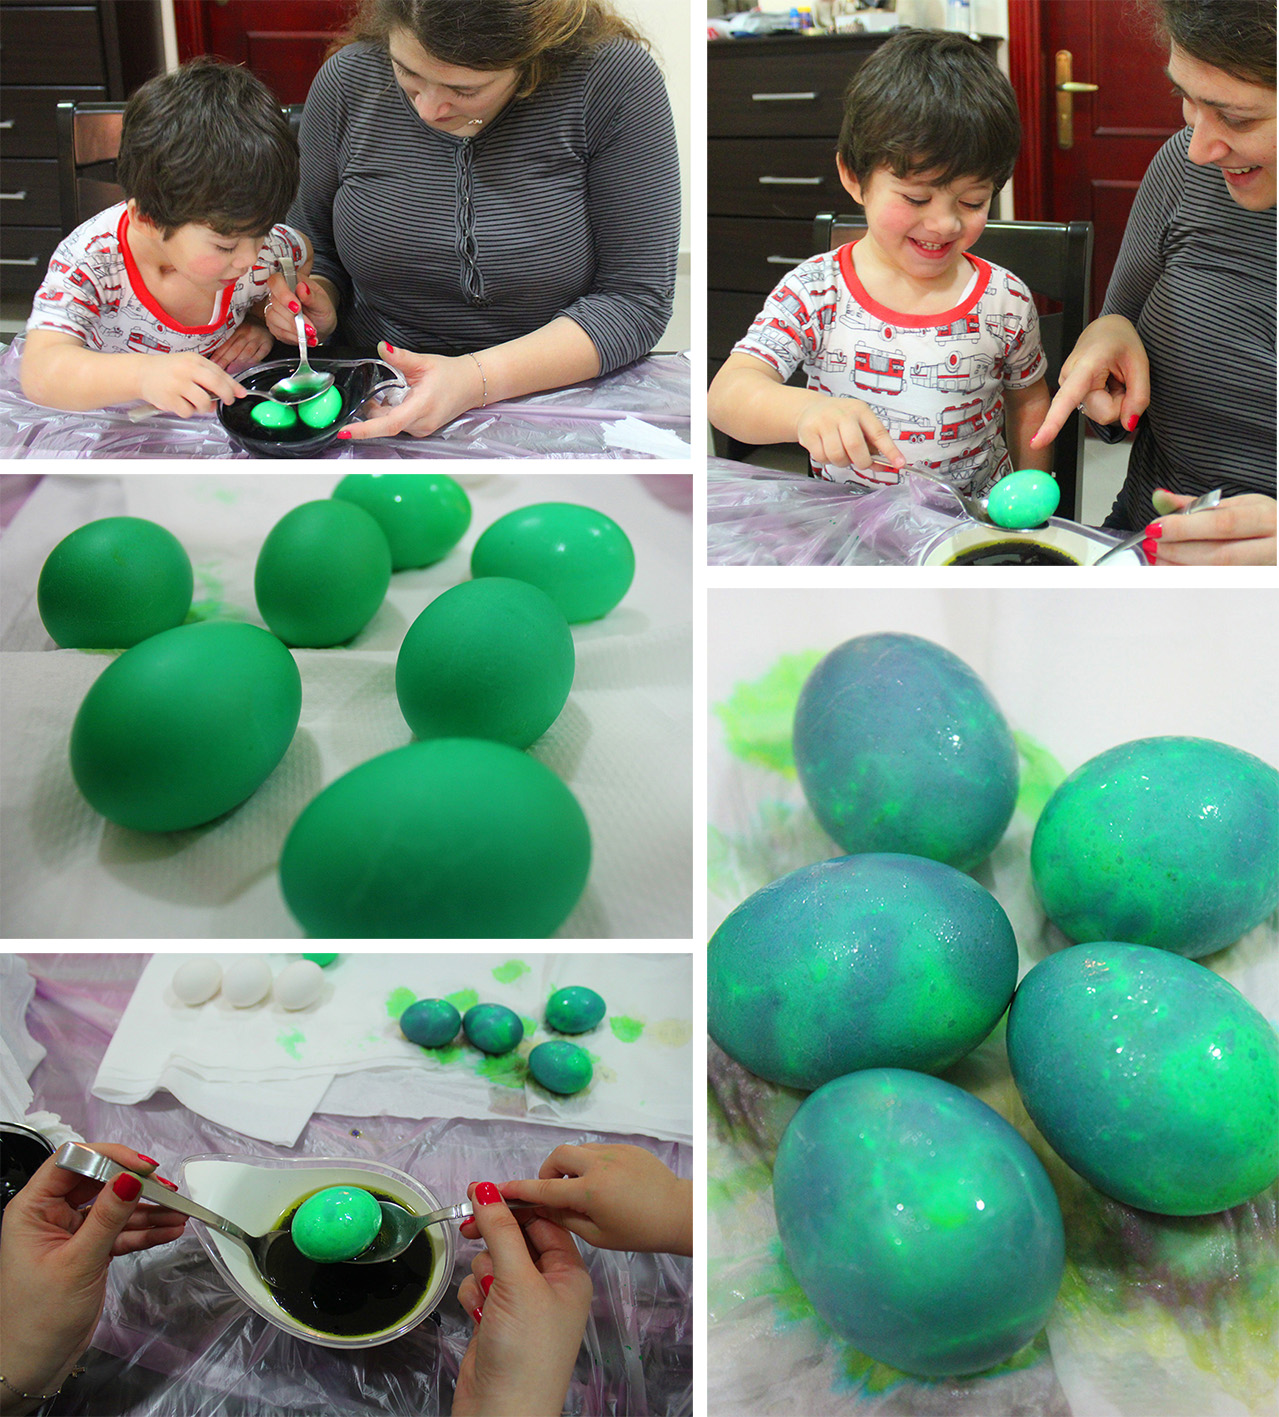
To make the dinosaurs eggs, you need first to dye the hard boiled eggs with a color of your choice. To marblize the dyed eggs (to give the effect of real dino ones), add a tbsp of olive oil to another color, preferably darker, then dip them in and let sit about 2 minutes before you pat dry.

I always recommend wilton coloring gel for healthy results.  Add vinegar to your colors for vibrant effect.

IMG_4842We tried as well with brownish colors to make it as real as possible!

IMG_4843
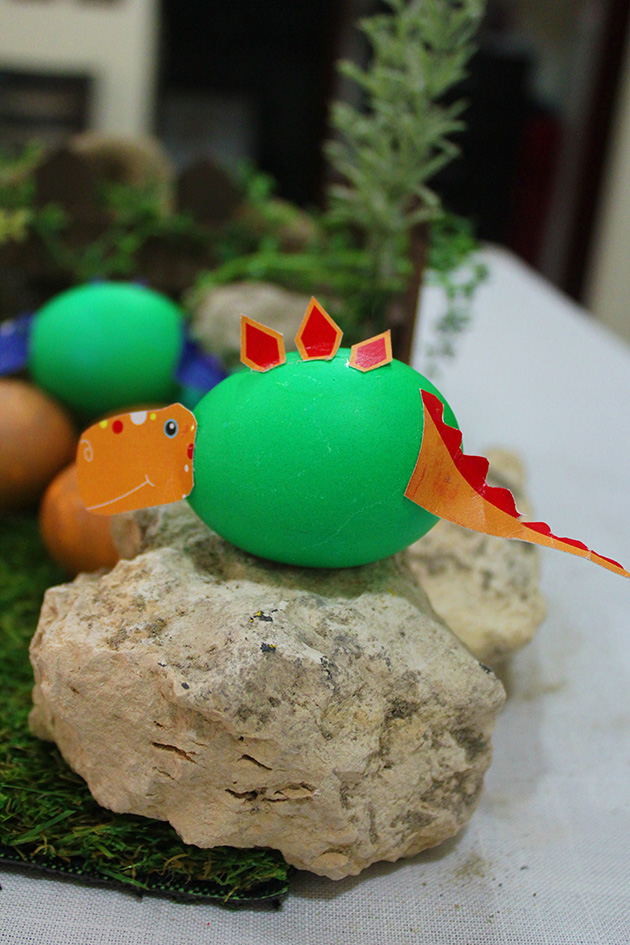
For the Dinosaurs, click here to download a high resolution file of the tail, back and head to stick on the eggs.

IMG_4845
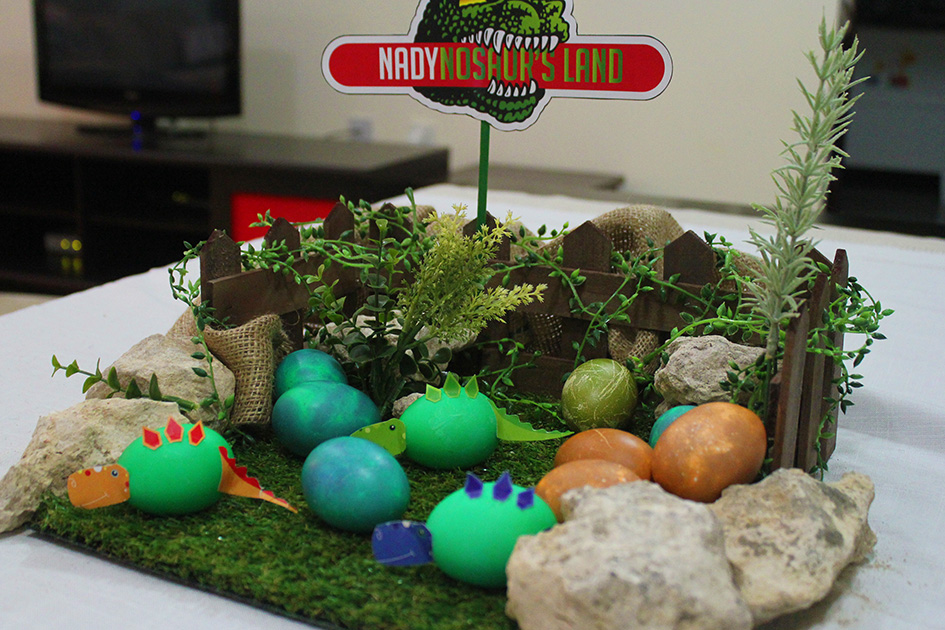
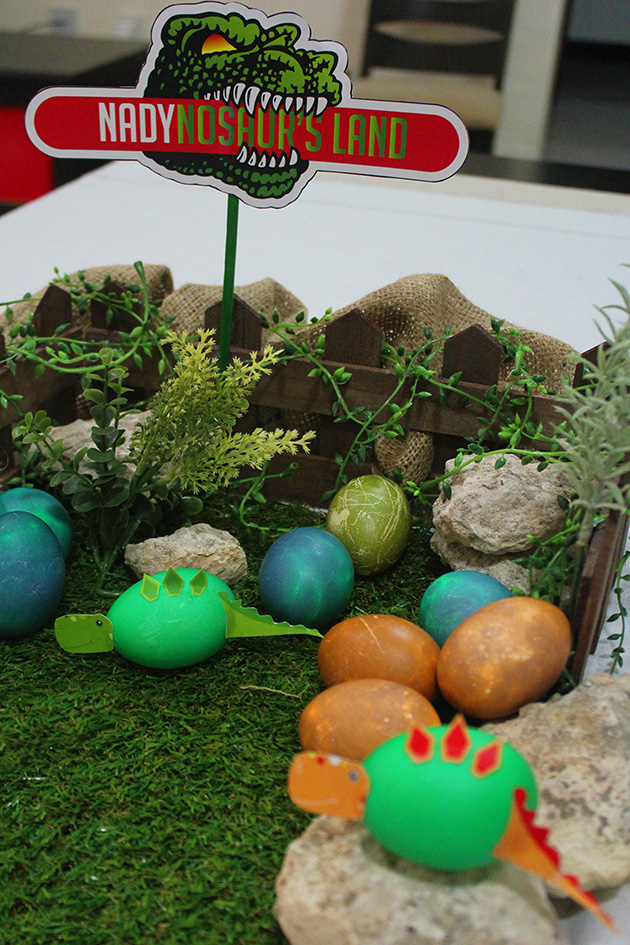
For the Nadynosaur banner, click here to download the file, you can easily change the name on it.

IMG_4852 IMG_4855 IMG_4858 IMG_4859

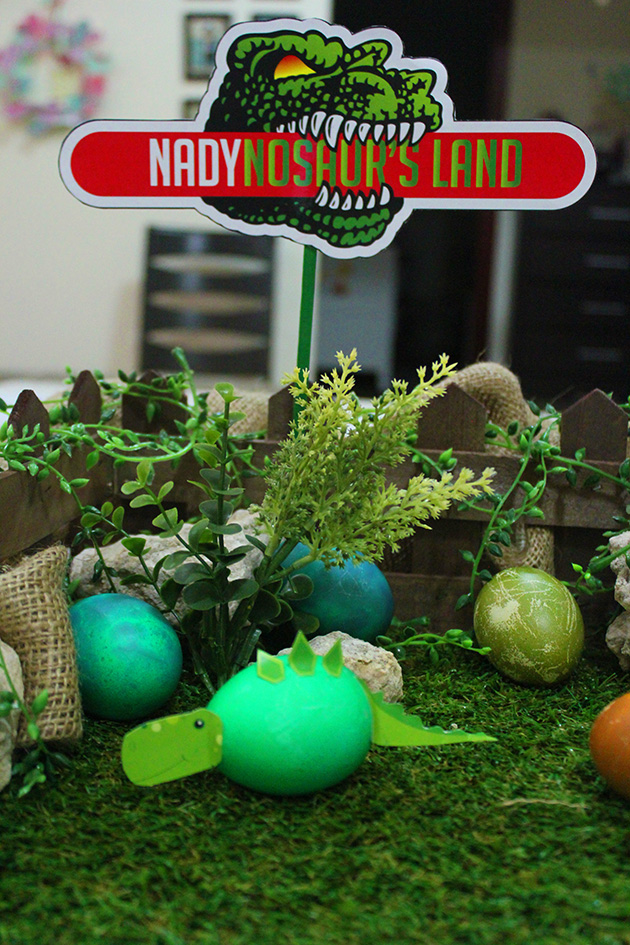
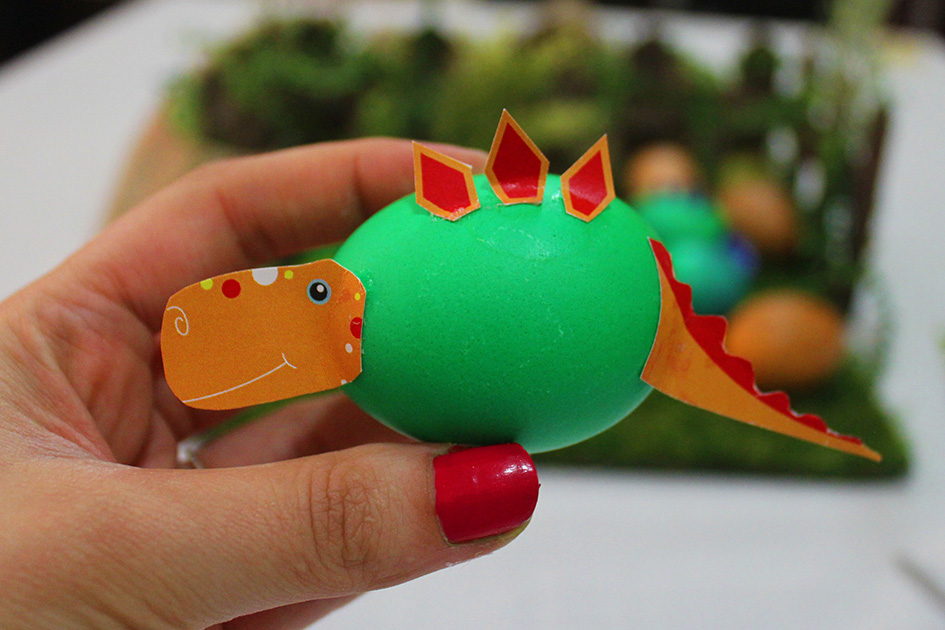
The biggest the park you want, the more eggs you should decorate. The files i attached present 3 color options of the dinosaurs; blue, green and orange. You can change easily to your favorite ones (vector files). Enjoy the best moments with your kids. Nothing better than seeing their happy faces! Just priceless!

IMG_4884 IMG_4885 IMG_4886

Happy Easter everyone. المسيح قام، حقاً قام

IMG_4892 IMG_4895

If you like this post give it some likes and shares to spread the joy. Don’t forget to like marmite et ponpon facebook page and follow on twitter. More interesting posts are yet to come.

Solve the riddle to find the egg surprise – Easter kids activity


riddles cardsIt’s very important for your kid to have interest in the play to enjoy it. This game was inspired by my son, seeing him Lately enjoying hide and seek game, and leaning toward riddles.

Since we’re preparing for Easter season i thought of doing an “egg surprise” hunt (stretched over 10 days for more fun). Everyday i hide one egg surprise and i give him directions in the form of riddles.

surprise egg hunt 1

Putting everything he likes in one game was absolutely the ultimum!

Riddles are fun and challenging, they have been shown to improve children’s comprehension and creativity, by working their brains.  At 2 years, riddles are very simple, the aim is to have fun and not break their heads, but if your children are older and can read than you can make the challenge harder, in this case riddles increase reading comprehension and strengthens problem solving and critical thinking skills.

surprise egg hunt 2

The written riddles was read by his father. They were both playing, since Antoun is a big fan of such games as well. For french version click on french riddle cards to download a high resolution file if you’re willing to play this game and for english one click on english riddle cards.

Such a fun and highly beneficial game, excellent to set Easter mood and bond with your kid.

surprise egg hunt 3

If you try it with your children, expect to see proud and victorious faces especially when they found the egg! it’s priceless!

This is what i call a way to play! If you like this post give it some likes and shares to spread the joy. Don’t forget to like marmite et ponpon facebook page and follow on twitter. More posts yet to come, stay tuned!

Easter bunny burlap bunting – Crafts for little hands


Easter bunny burlap buntingSpring has officially started so now let’s hop in Easter mood! Meaning it’s time to start our DIY home decoration. This year i am using burlap (jute) as a main element.

Crafting with my son is becoming even more fun as he grows up. He shows more interest and skills which makes me happy and proud. Not just that, he has an opinion too!

We started with a colorful bunting. First you need to cut out burlap triangles. Cut as much as you need and the convenient size, so when attached together, it makes the bunting length you want. Nady chose blue and green paint to make dots on the triangles with his tiny finger. You can use textile paint or acrylic paint.

IMG_4443My little man is becoming so independent, he refused any assistance! I was just sitting, watching and taking pictures!

burlap dottingWhen all done, leave them couple of hours to dry. In our case we left them overnight to extend more the fun!

IMG_4449Next step we used different colors of felt to cut bunny shapes. If you don’t have felt, choose any textile available. Crafts should be fun and entertaining not energy consuming. Enjoy this precious time with your little ones and make the most of it to be instructive too.

burlap rabbit buntingStick on each triangle a bunny. Click on bunny to download a high resolution file, you can adjust the size of the bunny depending on how big you want it.

Now bunnies need tails. The favorite part for nady. He loves pompoms! you can find pompoms everywhere in our house, even in the fridge! Yes in the fridge near the yogurt his favorite snack!

IMG_4464He was so excited using the glue alone without my help! The most phrase i heard in this craft was “tout seul maman”! (all alone maman). I remember last year when we did a bunny garland i was introducing a lot of new words that i was hearing this time gracefully. Kids grow up fast!

IMG_4466We had so much fun and it was a good exercise developing the fine motor skills and improving his vocabulary.

Use a thread or ribbon to attach the triangles next to each other.  Hang the bunting and enjoy 🙂

burlap easter buntingIf you like this post give it some likes and shares to spread the joy. Don’t forget to like marmite et ponpon facebook page and follow on twitter. More posts yet to come, stay tuned!

Snowman fridge – crafts for tiny hands


fridge snowmanAt christmas, people find themselves shopping for fancy decorations, huge and expensive trees that they compete over (as if there is a reward at the end of the season)and they end up paying leg and arm to decorate their houses. The result is forbidding their children from touching anything or enjoying the festivities.

The only reward that matters is seeing my son enjoying a real Christmas and living it to bits! To your kids, touching, discovering and playing with the colorful decorations means more than just admiring. Therefore, i never buy any decoration that i wouldn’t let him touch. In a previous post i showed you how to make handmade ornaments , my son loves to decorate and redecorate his own tree with no restrictions, we call it “le sapin de Nady”. The best way to introduce Christmas to your toddler is letting him live it.

Today we are doing a snowman fridge! The simplest ideas are the most striking. I enjoy crafting with Nady, especially he has a go at arts and crafts, i find it as fun and quality time together. All you need is self adhesive colored papers, but if you don’t have you can use regular colored ones and clear contact papers.

fridge snowman how to do

  • 5 black small circles to make the mouth
  • 2 bigger black circles for the eyes
  • an orange triangle for the nose
  • any colors you like to make 7-10 rectangles to form the scarf and 3-4 circles for the buttons.

If your fridge is not white you can still do it the dishwasher or a white door. I love the rich simplicity!

If you like this post give it some likes and shares to spread the joy. Don’t forget to like marmite et ponpon facebook page. More posts yet to come, stay tuned!

Reindeer advent calendar DIY


reindeer advent calendar

Dasher, Dancer, Prancer, Vixen, Comet, Cupid, Donner, and Blitzen, the flying reindeers leading Santa Claus sleigh will surprise you with a treat everyday 🙂

I know it’s not the time to start the countdown, but if you are willing to do your Advent Calendar by yourself as we did, you will need to prepare for it. Anyways it’s in three days.

So easy and fun to do. A great way to introduce Christmas to your toddler and live the fun of the season everyday. You will need:

  • 25 beige paper (200gsm) not too thick. you decide on the size depending how big you want to make the cone head
  • brown felt to do the antlers, i used approx. quarter meter. If you can’t find felt, use any thick paper to let the antlers stand.
  • 25 red pompoms for the nose
  • 50 wiggling eyes
  • red thread
  • 25 clothspin
  • numbers from 1-24
  • UHU liquid glue, and UHU patafix to fix the clothspins on the wall

how to do reindeerreindeer antlersAs the step by step above picture shows, create a cone very similar to the popcorn one. stick the eyes and nose, better say let your child enjoy sticking them in the right place! Cut the antlers and stick them (i used the UHU liquid glue), make two holes on both sides to insert the red thread. The last thing to do, stick the numbers on the clothspin and attach it to the thread.

advent calendar for christmasAttach them on the wall in tree shape from 1 to 24. I used UHU patafix to not spoil the paint. You can hang them on a wire (thread) next to each other if your plan is not to fix them on the wall.

Let the countdown begin!

advent calendar with nadyadvent calendar reindeeradvent calendar with candiesI kept the last 2 rows empty, Nady has always his new games and rules, he was enjoying hiding his small toys. Anyways we won’t be here to use them, didn’t i mention we are going home to celebrate Christmas with our family??! Yes, we are and can’t wait!

advent calendar with reindeersadvent calendar - reindeersIf you like this post give it some likes and shares to spread the joy. Don’t forget to like marmite et ponpon facebook page. More posts yet to come, stay tuned!