Category Archives: way to play

DIY homemade playdough (pate a modeler) – kids safe recipe


homemade playdough

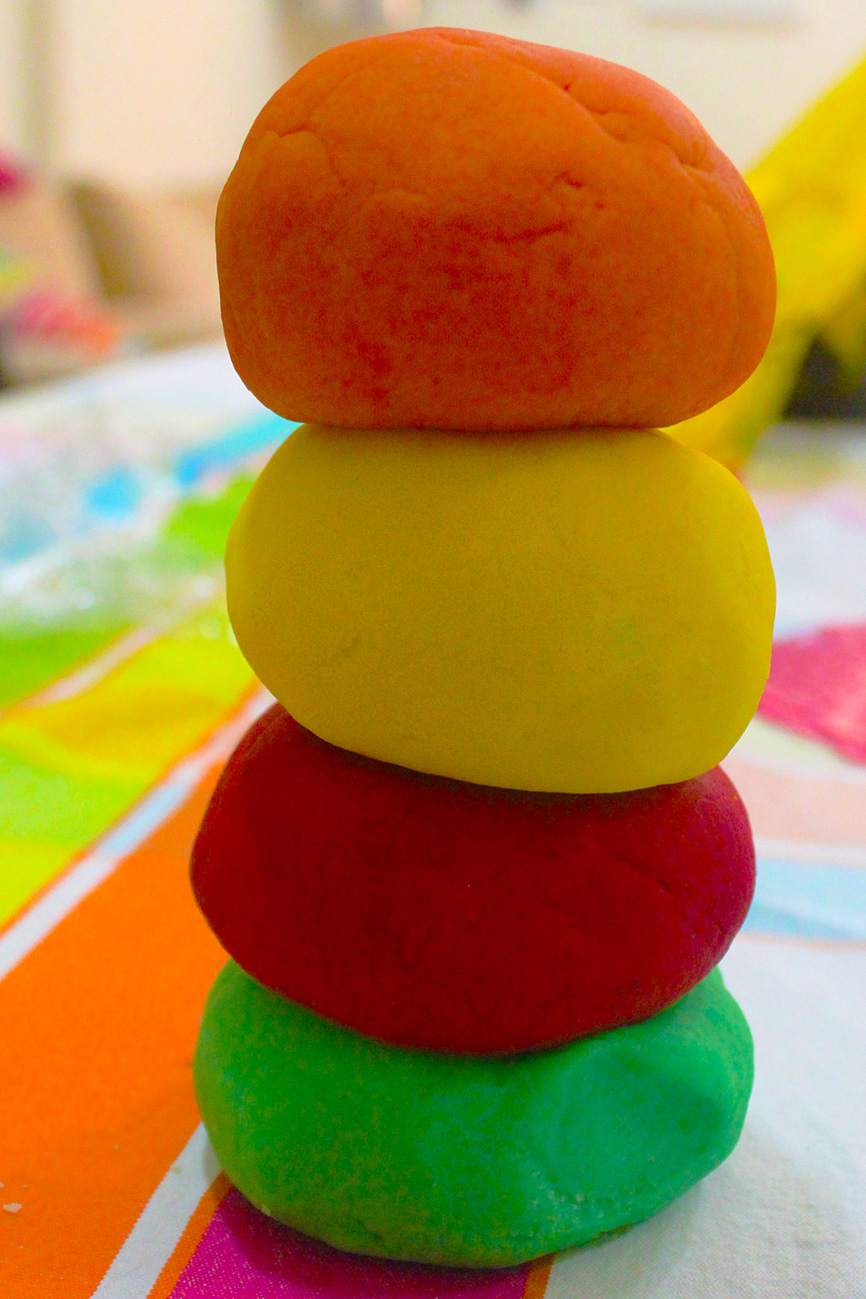
Making playdough at home is easier than you think. A healthy way to ensure your kids safety. All you need is couple of ingredients and 10 minutes of your time and let the fun and creativity begin.

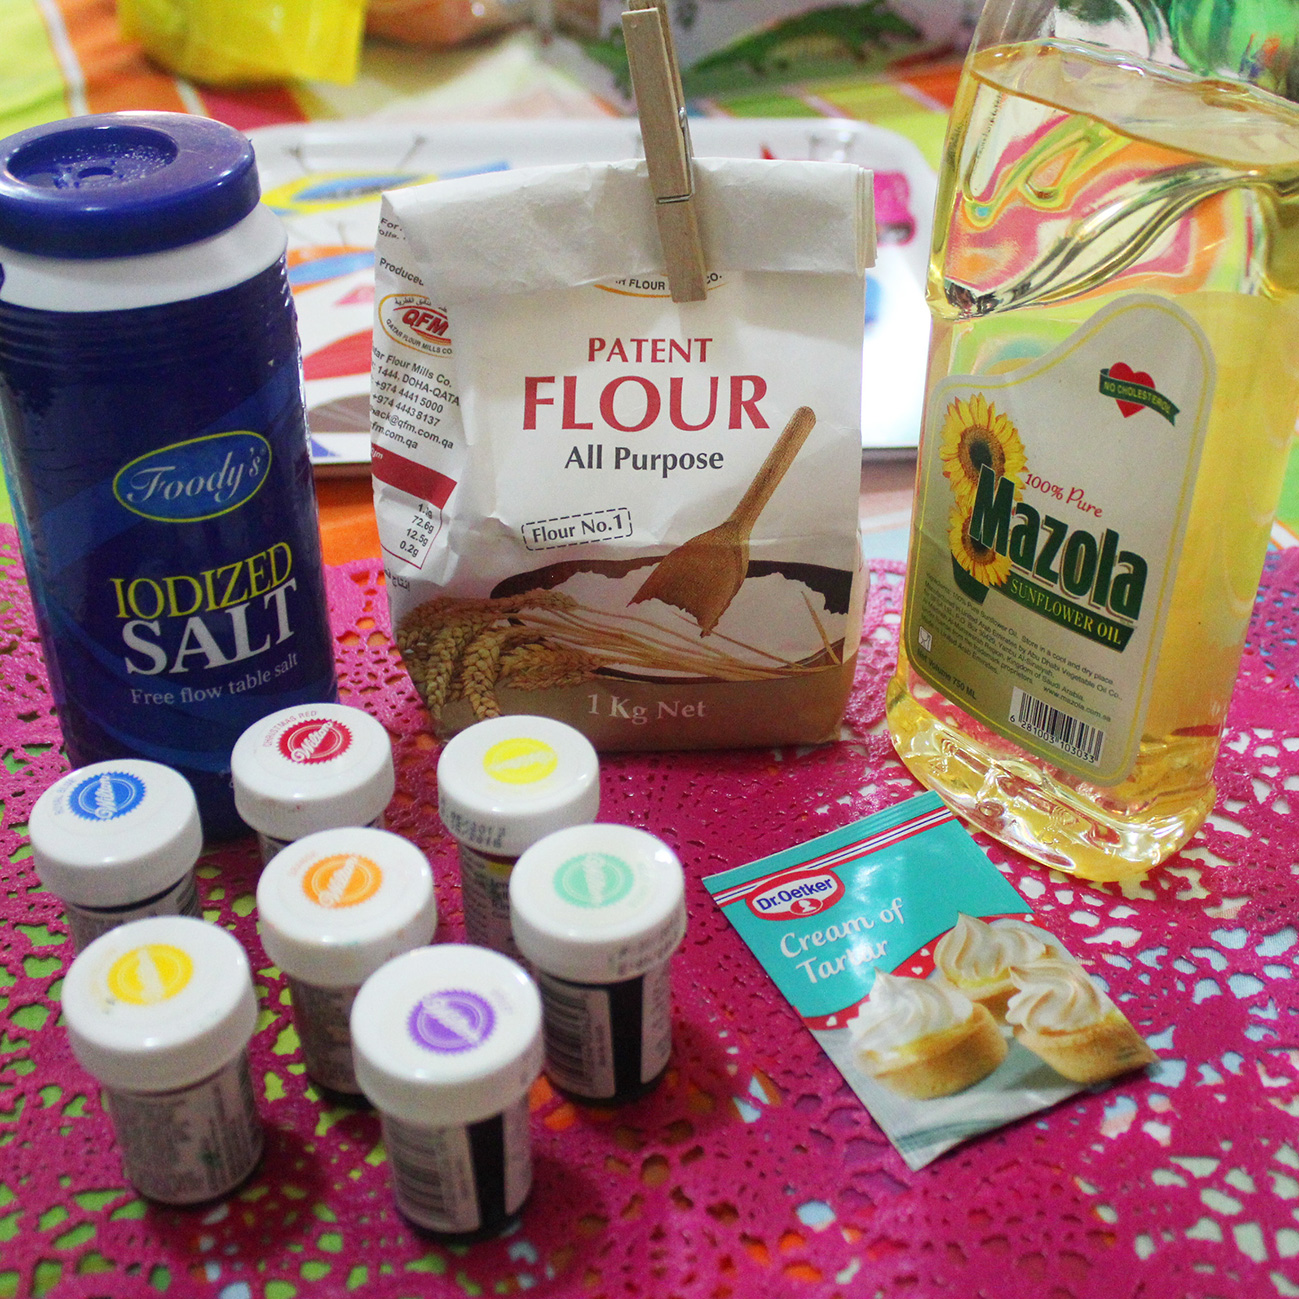
Ingredients: (make about 2 cups)

  • 1 cup flour
  • 1 cup water
  • 2 tsp cream of tartar
  • 1/3 cup salt
  • 1 tbsp vegetable oil
  • food coloring

homemade playdough

In a sauce pan combine all dry ingredients then add water, oil and food coloring. Mix well until no lumps show.

Cook over medium heat and stir constantly until the dough forms a ball and no longer sticky. This will take almost 3-4 minutes.

Remove from the pan and keep to cool before kneading until smooth.

homemade playdough

This playdough can stay long if you store it properly. Wrap it with cling film and keep it in a locked container or simply put it in a plastic zipper bag at room temperature.

homemade playdough

This playdough is 100% safe if your kid wants to taste. My boy is still under 2 years he likes to taste everything, i make sure we always play with edible or safe games.

homemade playdough

Stay tuned, i will post tomorrow one of many playdough games that we do:

Jungle pate a modeler (playdough) game


Creative easter eggs – the Farm – DIY


creative easter eggs - the farm

Today is the saturday of light! the day we prepare the eggs for Easter sunday.

As promised before, this is a step by step to this year eggs.

Nady loves the song “old macdonald had a farm”, this where the idea came from, Cows farm.

With a black marker, draw the cow’s pattern on white hard boiled eggs.

1creative easter eggs - the farm

creative easter eggs - the farmAfter all is done, stick the cow’s face.

creative easter eggs - the farm

creative easter eggs - the farm


Click here to download a high resolution file of the cow’s head.

creative easter eggs - the farm

To decorate the farm with couple of flowers, you need to dye with some colors. I always recommend wilton gel color.

creative easter eggs - the farm

Wrap the egg with a green ribbon and stick a flower, very quick and easy.

creative easter eggs - the farm

creative easter eggs - the farm

creative easter eggs - the farm

creative easter eggs - the farm

Nady is extremely happy and excited about the farm, yes it’s Nady’s farm with cows! The cows give us milk, les vaches nous donnent du lait…. Singing 🙂

creative easter eggs - the farm

creative easter eggs - the farm

creative easter eggs - the farm

La ferme de Nady 🙂

Happy Easter to all of you!

المسيح قام، حقاً قام

If you like this post give it some likes and shares to spread the joy. Don’t forget to like marmite et ponpon facebook page and follow on twitter. More interesting posts are yet to come.

buttons made Easter bunny – DIY door hanger


buttons bunny - DIY easter door hanger

Easter fun is still on! Crafting with jeddo (grandfather) Maurice! A bunny made with colorful buttons to decorate the front door. We are enjoying every minute with my parents.

Very easy DIY door hanger for easter. All you need is a bunny cut out and buttons. Click here to download a high resolution file.

bunny

buttons

All you need to do is to fill the bunny tummy with buttons of different sizes and colors. Stick two eyes and a ribbon behind the ears for hanging.

buttons bunny - DIY easter door hanger

buttons bunny - DIY easter door hanger

buttons bunny - DIY easter door hanger

Isn’t it attractive? Nady was fascinated with the colors. I love Easter, a happy and colorful holiday always coinciding with the spring season.

buttons bunny - DIY easter door hanger

If your baby is still discovering with his mouth, avoid small buttons. Nady tasted all of them 🙂

buttons bunny - DIY easter door hangerIt’s a fun way to teach the colors to your kid.

buttons bunny - DIY easter door hangerGuess who was more happy?!

buttons bunny - DIY easter door hanger

The door hanger is ready! Easter decoration is almost done, we still have to decorate the eggs on saturday. Don’t miss this year’s special eggs. Wait for the post 🙂

spring/easter crafting – wooden spoon puppet – DIY – step by step


aspring/easter crafts - wooden spoon puppet

Wooden spoons are not just for mommy to use in the kitchen, kids can create cute characters such as Easter rabbit or chick and spring lady bug to go with the flowers we crafted before.

A very easy bricolage and a lot of fun. If your kid is under 3 years, paint the spoons yourself and let it dry before starting to play together. I recommend acrylic paint but don’t mix it with water for more vibrant colors.

Small details to stick with your kids such as pompom, wiggling eyes, feather…. are more instructional then you think. Learning the shapes, names, colors and you can extend the fun by telling stories about Easter and spring.

Lady bug:

lady bug


Nady was so much interested and fascinated with the lady bug antennas.

easter/spring craft -wooden spoon characters

Chick:

Adjusting the comb

chick1

… and the beak

beac

chick 3Eh voila chick (le poussin)!

Rabbit:

N and rabbit Fixing the ears and nose

rabbitThe three all together! they look so cute

easter/spring craft -wooden spoon characters

After playing with the spoons puppet, it’s time to add them to our precious flower vase.

easter/spring craft -wooden spoon characters

easter/spring craft -wooden spoon characters

It was such a joy for him. He kept playing and contemplating their fascinating colors for an hour

easter/spring craft -wooden spoon charactersWe love the spring season and can’t wait for Easter!

easter/spring craft -wooden spoon characters


kids spring/Easter crafts, yellow flowers (DIY- step by step)


bouquet

The color festival is still on! Celebrate the spring and pre-easter season with your kids. Develop their fine motor skills, and teach them colors.

My boy is learning the spring season and the yellow color at the nursery. I thought of DIY yellow paper flowers. Why not? It could be the table centerpiece at Easter. Lets have fun!

First we need a vase. Empty cheese jar was an excellent idea. We decorated it with colorful japanese washi tape.

kiri cheese pot

The minute I set down the material on the table, Nady showed an unbelievable excitement.

You will be surprised how much you can do with just papers; Pinwheel daffodil, marigold, daisy, tulip and geranium, for this time.

Follow me step by step on how we do the pinwheel daffodil.

how we do dafodil pinwheel


pinwheel

Marigold:

how to do marigold

marigold

Daisy, tulip and geranium. Click on flowers cut outs for a high resolution file.

flower cut outs

daisy, tulip and geranium

Green straws for the stems.

stick on straw Et voila!

all flowers designs

Simply gorgeous! Nady was so happy, contemplating the beauty of the flowers.

spring flowers DIY

spring flowers DIY 2

spring flowers DIY 3

So excited, he started to collect the flowers to make a bouquet.

spring flowers DIY 4

spring flowers DIY 5

Nady’s reaction to this activity was unexpected. I was extremely happy from his response. Crafting today was extremely beautiful and fun. He grabbed the vase and started to fill it with the flowers.

spring flowers DIY 6

spring flowers DIY 7

spring flowers DIY 8Busy boy 🙂 So proud of himself.

spring flowers DIY 8