Tag Archives: step by step

DIY – “My angel” Palm Sunday candle


IMG_4630There are endless ways to decorate a Palm Sunday candle; fast, simple yet elegant. This one is so fresh and springy and could go for both boys and girls and match several outfit colors. It won’t take too much of your time and doesn’t require craft skills.

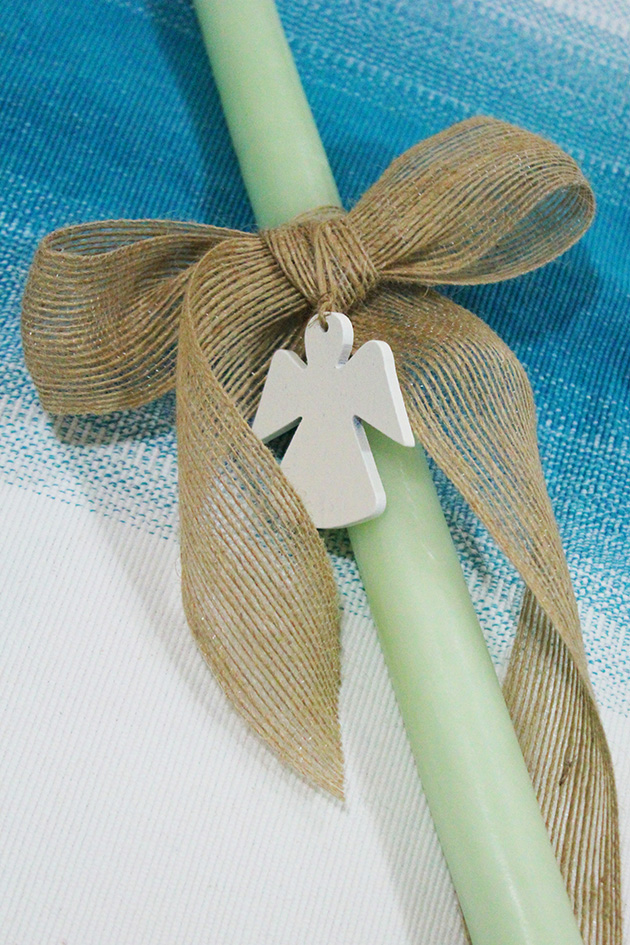
Follow the step by step tutorial and make it ready in less than 10 minutes. All you need is : A candle (i chose light green), burlap ribbon and angle motif (i chose a white wooden one)

how to do angel palm sunday candle

  • Wrap a piece of the burlap ribbon around the candle
  • Make a bow of the same ribbon and stick it on it
  • Hold the angel motif with a burlap thread in the center of the bow

I told you it won’t take even 10 minutes. To prepare the material requires even more time!

IMG_4631For more Palm Sunday candles ideas, check these ones posted before on marmite et ponpon:

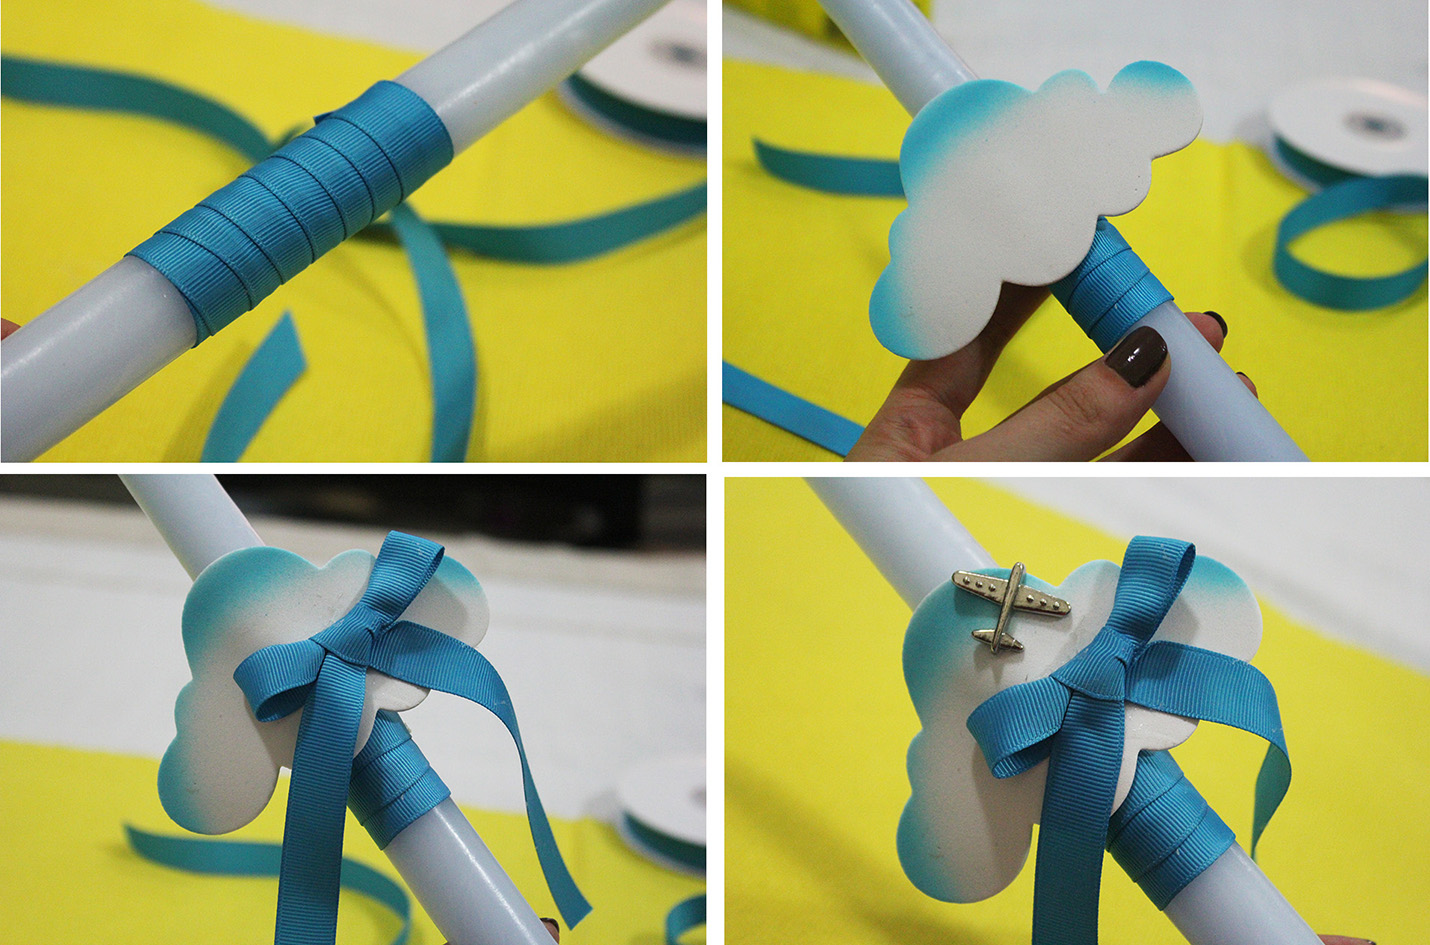
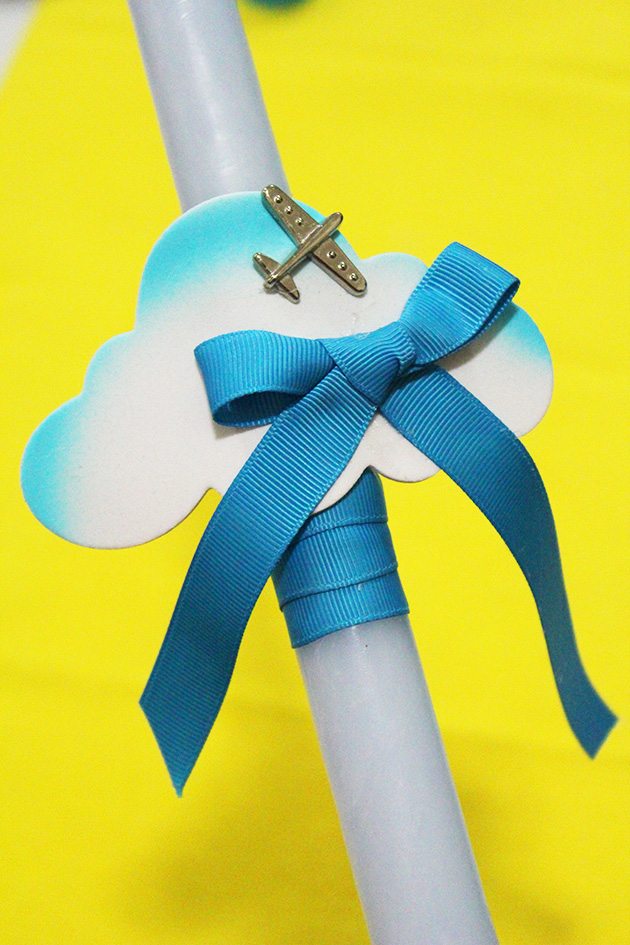
1- Baby aviator Palm Sunday candle

2- Nautical Palm Sunday candle

3- Marine Palm Sunday candle

4- Flowers Palm Sunday candle

5- Traditional olive branch Palm Sunday candle

If you like this post give it some likes and shares to spread the joy. Don’t forget to like marmite et ponpon facebook page and follow on twitter. More posts yet to come, stay tuned!

DIY – Baby aviator Palm sunday candle


IMG_4599Sometimes when you have a baby (who is not able to hold his candle on his own), you found yourself hesitating whether you get him a decorated candle or no. Personally i do encourage having one, if you choose a smaller size candle with convenient decorations. When your baby is 3 months+  it’s possible he can keep a firm hold of it, with your help. I did it but without lighting the candle, he really enjoyed it!

If you are willing to do one, follow the step by step tutorial for a baby aviator Palm Sunday candle:

how to do plane palm sunday candle

  • Wrap a blue ribbon around the candle you choose. I used a baby blue one
  • Stick a cut out cloud (foam) on the ribbon
  • Make a bow of the same blue ribbon and stick it on the cloud
  • Metal, wood or even paper plane look beautiful on the cloud, direction up as if flying

It’s a very easy craft, It doesn’t require too much skills and the outcome is amazing. When you DIY something for your kids, it holds lots of love and memories and It means a lot to your kids as well, they will remember it for a long time!

IMG_4596If you like this post give it some likes and shares to spread the joy. Don’t forget to like marmite et ponpon facebook page and follow on twitter. More posts yet to come, stay tuned!

Origami Santa napkin ring


origami santa-napkin ringYou already know how fond of origami art i am. Christmas dinner is the perfect  occasion to concretize this passion and create nice ideas for the table settings. After the napkin folding christmas tree here is an idea of how to fold Santa for a napkin ring.

You might think it’s complicated but if you follow step by step the scheme i created for you, you will find it so easy.

how to do santa origamiAll you need is a square paper, one side red and the other white to get this cute Santa. Depending on the thickness of your napkin, cut a rectangular paper to form the ring, attach it to the back of Santa et voila!

origami santa napkin ringAlways add a your personal touch to make things special and memorable. You don’t have to be an artist to impress, beauty is in small details.

I hope you all get an unforgettable Christmas, red in your love, white in your heart and gold in your pocket 😉

origami-santa napkin ringIf you like this post give it some likes and shares to spread the joy. Don’t forget to like marmite et ponpon facebook page and follow on twitter. More posts yet to come, stay tuned!


From a toilet paper roll to a beautiful christmas gift box


Exchanging presents at Christmas is one of the most exciting rituals. Sometimes you find yourself wondering how to wrap small items, money or gift vouchers in other than a simple envelope that might be lost between the huge colorful gifts! These handmade gift boxes are the perfect solution.

Turn a toilet paper roll to a beautiful christmas gift box in just 10 minutes. Yes it’s a toilet paper roll!

how to do toilet paper roll gift boxFlatten it with your hand and fold half moon on both ends front and back. The box will come together even without glue.

Now unleash your creativity in decorating the box. You can use anything that comes to your mind.

how to decorate toilet paper roll gift boxStart timing ; Cover it with a red paper, wrap around a golden thread, attach 2 small bells to both ends and stick a small ornament. I used a star made with salt dough (already showed how to do in a previous post). Stooooop! I bet it took less than 10 minutes.

toilet paper roll decorationsHere are four other ways to decorate your gift box

  • 1. beige paper, green striped washi paper, red ribbon and green button
  • 2. doily lace paper, red polka dot paper. red ribbon, 2 red buttons
  • 3. green polka dot paper, golden paillette thread, 3 salt dough stars, 3 green stars made of sugar
  • 4. red polka dot paper, green ribbon and small santa hat

santa hat toilet paper roll gift boxLet your gifts stand out this Christmas, and make your loved ones excited about the wrap more than the gift itself! I would say give a double present this year!

bells paper roll gift boxAlways add your personal touch to anything you offer, it makes you presents more precious and full of thoughts and love. Ditch expensive wrappings and go simple and creative with materials you already have at home and impress your family and friends.

green button paper roll gift boxYou still have time to save the toilet paper rolls, don’t throw them! Make extra gift boxes, fill them with candies and make all the children you know happy! It could be children you don’t know…. This is actually what’s all about in Christmas.

red buttons toilet paper roll gift boxIf you like this post give it some likes and shares to spread the joy. Don’t forget to like marmite et ponpon facebook page and follow on twitter. More posts yet to come, stay tuned!

Reindeer advent calendar DIY


reindeer advent calendar

Dasher, Dancer, Prancer, Vixen, Comet, Cupid, Donner, and Blitzen, the flying reindeers leading Santa Claus sleigh will surprise you with a treat everyday 🙂

I know it’s not the time to start the countdown, but if you are willing to do your Advent Calendar by yourself as we did, you will need to prepare for it. Anyways it’s in three days.

So easy and fun to do. A great way to introduce Christmas to your toddler and live the fun of the season everyday. You will need:

  • 25 beige paper (200gsm) not too thick. you decide on the size depending how big you want to make the cone head
  • brown felt to do the antlers, i used approx. quarter meter. If you can’t find felt, use any thick paper to let the antlers stand.
  • 25 red pompoms for the nose
  • 50 wiggling eyes
  • red thread
  • 25 clothspin
  • numbers from 1-24
  • UHU liquid glue, and UHU patafix to fix the clothspins on the wall

how to do reindeerreindeer antlersAs the step by step above picture shows, create a cone very similar to the popcorn one. stick the eyes and nose, better say let your child enjoy sticking them in the right place! Cut the antlers and stick them (i used the UHU liquid glue), make two holes on both sides to insert the red thread. The last thing to do, stick the numbers on the clothspin and attach it to the thread.

advent calendar for christmasAttach them on the wall in tree shape from 1 to 24. I used UHU patafix to not spoil the paint. You can hang them on a wire (thread) next to each other if your plan is not to fix them on the wall.

Let the countdown begin!

advent calendar with nadyadvent calendar reindeeradvent calendar with candiesI kept the last 2 rows empty, Nady has always his new games and rules, he was enjoying hiding his small toys. Anyways we won’t be here to use them, didn’t i mention we are going home to celebrate Christmas with our family??! Yes, we are and can’t wait!

advent calendar with reindeersadvent calendar - reindeersIf you like this post give it some likes and shares to spread the joy. Don’t forget to like marmite et ponpon facebook page. More posts yet to come, stay tuned!