Tag Archives: marmite et ponpon

Sweet balsamic glazed salmon


IMG_4922I guarantee you it’s the only way you will ever make your salmon from now on. The sweet and tangy flavors blend together to give you this flavorful salmon.

Beside of having a quick meal, ready on your table within 20 mns, you will be enjoying a sustaining dish full of nutrients, such as the amazing omega-3, vitamin B3, B6 and B12, protein and vitamin D.

Bottom line, eating salmon makes you smarter and happier!

IMG_4898To make the glaze you will need:

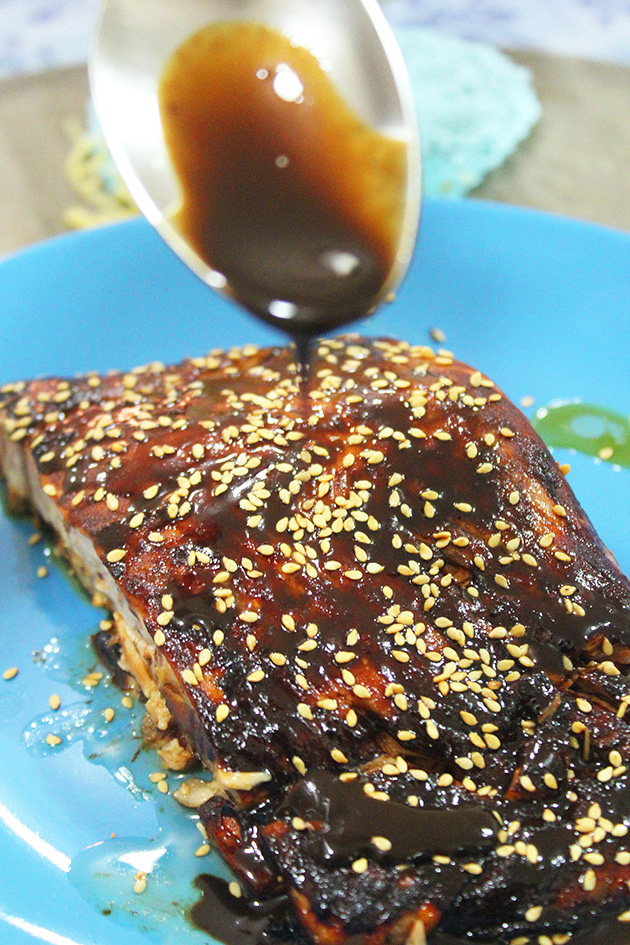
  • 1/2 cup balsamic vinegar
  • 1 tbsp honey
  • 1 tbsp brown sugar
  • 2 tbsp Dijon mustard
  • salt to taste

Mix all ingredients and bring to boil for 5 minutes to thicken.

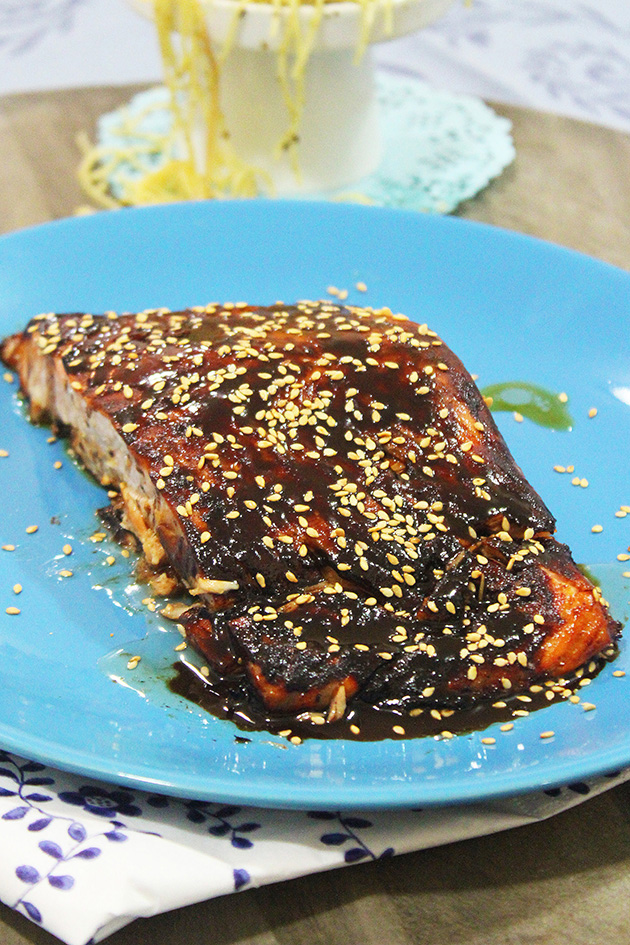
Place 4 pieces of salmon (each 200g) skin-side down on the prepared baking sheet. Cooking in baking papers keeps the fish deliciously moist as it bakes in its own juices, minimal cleanup needed later and it’s definitely more healthy than aluminium foil.

Brush with the glaze, bake for 10 minutes in the oven on 200°C, brush again with the glaze then bake uncovered for 5 additional minutes, until the fish flakes easily with a fork and is cooked through.

IMG_4917

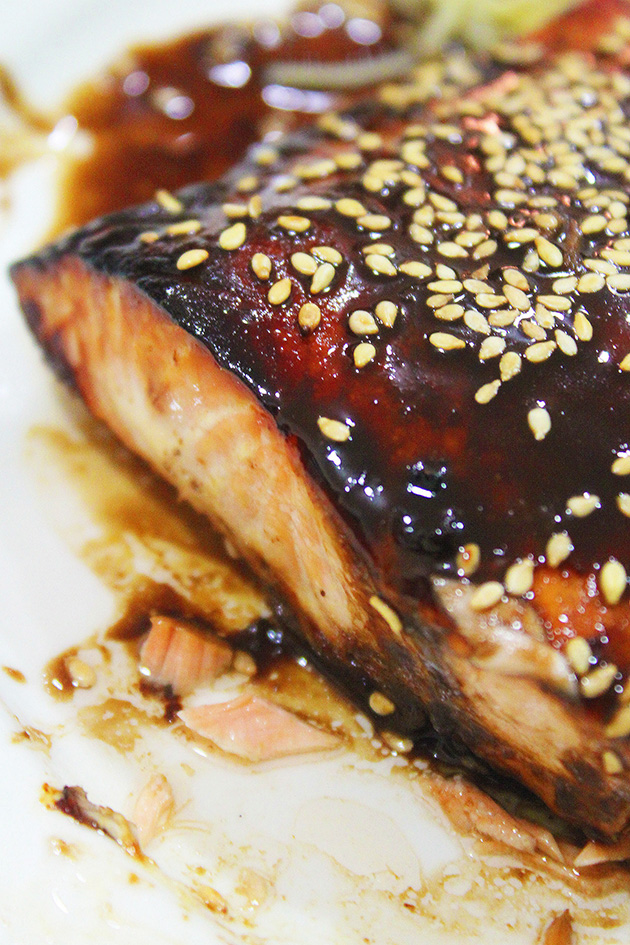
Transfer to your plate, you will see the skin will remain easily on the baking paper, add the remaining glaze and sprinkle with sesame seeds. Serve with potatoes, rice or pasta. This quantity serves 4 people.

IMG_4902This tender, flaky and flavorful salmon will leave you basking in compliments from your loved ones!

IMG_4906If you like this post give it some likes and shares to spread the joy. Don’t forget to like marmite et ponpon facebook page and follow on twitter. More posts yet to come.

Creative Easter eggs decoration -Dinosaurs land- DIY


IMG_4896As i always say, my son is my source of inspiration. He is so much into dinosaurs lately, so a NADYnosaurs land is the perfect idea for this year’s Easter eggs.

As promised in previous post and If you’re willing to recreate this dino park, follow me step by step in this tutorial, it’s much easier than you think.

IMG_4801To make the dinosaurs eggs, you need first to dye the hard boiled eggs with a color of your choice. To marblize the dyed eggs (to give the effect of real dino ones), add a tbsp of olive oil to another color, preferably darker, then dip them in and let sit about 2 minutes before you pat dry.

I always recommend wilton coloring gel for healthy results.  Add vinegar to your colors for vibrant effect.

IMG_4842We tried as well with brownish colors to make it as real as possible!

IMG_4843For the Dinosaurs, click here to download a high resolution file of the tail, back and head to stick on the eggs.

IMG_4845For the Nadynosaur banner, click here to download the file, you can easily change the name on it.

IMG_4852 IMG_4855 IMG_4858 IMG_4859

The biggest the park you want, the more eggs you should decorate. The files i attached present 3 color options of the dinosaurs; blue, green and orange. You can change easily to your favorite ones (vector files). Enjoy the best moments with your kids. Nothing better than seeing their happy faces! Just priceless!

IMG_4884 IMG_4885 IMG_4886

Happy Easter everyone. المسيح قام، حقاً قام

IMG_4892 IMG_4895

If you like this post give it some likes and shares to spread the joy. Don’t forget to like marmite et ponpon facebook page and follow on twitter. More interesting posts are yet to come.

Easter bunny burlap runner – DIY


IMG_4767It’s the third item in the burlap inspired decoration. After the door wreath and the bunting here we DIY a table runner to complete the set. A beautiful yet simple craft to be able to involve your kids.

First you need to cut a burlap sheet, convenient size to your table (mine was 170x45cm) and better to sew the edges so it doesn’t unravel. Cut out some colored felt bunnies (or other material, whatever you have available). Click on bunnies to download a high resolution file of the bunnies silhouette, i made it as big as could fit on my runner size.

how to make burlap easter bunny runnerWith the help of your kids, paste the bunnies on the burlap runner, i used simple UHU glue, but make sure you put something under it to protect the table then glue the pompom tails.

IMG_4778

Our home decoration is done now. We still have to decorate the eggs and we are ready for Easter. Don’t miss the coming post for our creative Easter eggs. Stay tuned i am sure you will love!

If you like this post give it some likes and shares to spread the joy. Don’t forget to like marmite et ponpon facebook page and follow on twitter. More posts yet to come.

Solve the riddle to find the egg surprise – Easter kids activity


riddles cardsIt’s very important for your kid to have interest in the play to enjoy it. This game was inspired by my son, seeing him Lately enjoying hide and seek game, and leaning toward riddles.

Since we’re preparing for Easter season i thought of doing an “egg surprise” hunt (stretched over 10 days for more fun). Everyday i hide one egg surprise and i give him directions in the form of riddles.

surprise egg hunt 1

Putting everything he likes in one game was absolutely the ultimum!

Riddles are fun and challenging, they have been shown to improve children’s comprehension and creativity, by working their brains.  At 2 years, riddles are very simple, the aim is to have fun and not break their heads, but if your children are older and can read than you can make the challenge harder, in this case riddles increase reading comprehension and strengthens problem solving and critical thinking skills.

surprise egg hunt 2

The written riddles was read by his father. They were both playing, since Antoun is a big fan of such games as well. For french version click on french riddle cards to download a high resolution file if you’re willing to play this game and for english one click on english riddle cards.

Such a fun and highly beneficial game, excellent to set Easter mood and bond with your kid.

surprise egg hunt 3

If you try it with your children, expect to see proud and victorious faces especially when they found the egg! it’s priceless!

This is what i call a way to play! If you like this post give it some likes and shares to spread the joy. Don’t forget to like marmite et ponpon facebook page and follow on twitter. More posts yet to come, stay tuned!

Easter/spring burlap door wreath


IMG_4525The second item falling in the burlap decoration series, a colorful door wreath! Last year we did buttons made bunny, we had to remove it after Easter which made Nady a bit disappointed. This year our door decoration is more springy to keep it longer!

Cut a big circle of styrofoam then a smaller one within to make it look like a hoop. Wrap it with burlap and here it is, ready to decorate with pinwheels and flowers done with your sweetheart’s tiny hands with so much enthusiasm and love!

All you need is felt and burlap cut in squares and glued back to back. This is how we do pinwheels, step by step.

how to do a pinwheel flowerDepending on the size, you decide how many pinwheels to do. We made 3 different sizes and colors, as per Nady choice. He was the leader of the craft and i was following his instructions.

spring wreathInitially i prepared for only pinwheels, but he asked to add flowers, specifically green, yellow and purple 🙂

Click on flowers to download a high resolution file to help you trace them before cutting.

IMG_4521

Such activities develop your child’s motor skills while having fun cutting, pasting, folding, drawing, tracing, and coloring. . .  These are big skills for tiny hands. It’s beautiful to see your children growing and being proud of their achievements!

“i can paste”! don’t undermine this sentence. Motor skills enable your child to perform important everyday tasks, and when combined with hand – eye coordination also open new doors to exploration, learning, and creative expression.

Researches show that emphasis on purely intellectual activities such as memorization of letters and numbers… is far less useful at this stage than encouraging fine motor abilities and hand-eye coordination. These skills lay the foundation for academic learning in later years. In order to learn to write or draw, for example, a child’s hand must be strong enough to hold a pencil steady for a long period of time.

The best way for you to help promote motor skills is to provide your child with a good choice of materials (blocks, crayons, nontoxic and washable markers and paints, paste, glue, modeling clay, safety scissors…) to manipulate as his imagination dictates.

IMG_4524We played a bit with the wreath before mounting it on the door. That was the best part; my precious is exploring the different usages of it 🙂

IMG_4527IMG_4531

This is what i call a way to play! If you like this post give it some likes and shares to spread the joy. Don’t forget to like marmite et ponpon facebook page and follow on twitter. More posts yet to come, stay tuned!