Tag Archives: food blogger

Pineapple cake and pineapple flower DIY tutorial


pineapple cake
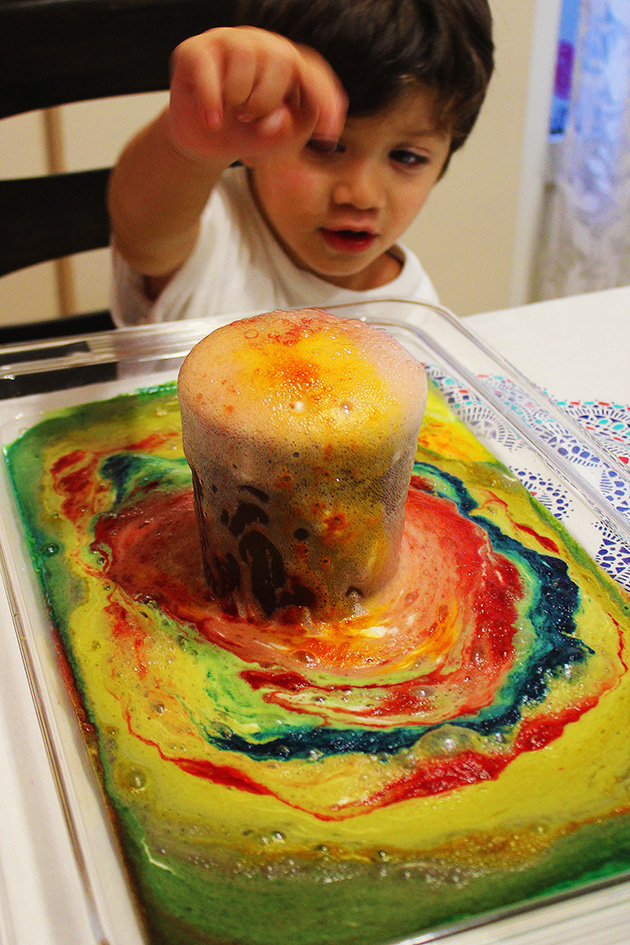
The joy of baking a cake for a special occasion shows that simple things in life are the best, a personal touch makes things memorable. Despite the difficulty of having a time on my own with a newborn, i insisted baking Antoun’s birthday cake myself. This is how we are used to celebrate and i won’t change this routine.

A pineapple cake sounds perfect, we all love pineapple at home. To prepare the batter we need:

  • 3 cups flour sifted
  • 1 tbsp baking powder
  • 1/2 tsp salt
  • 1 cup unsalted and softened butter
  • 1 3/4 cup sugar
  • 3 eggs
  • 2 egg yolks
  • 1 cup milk
  • 1/2 cup pineapple juice
  • 2 tsp vanilla extract

Preheat oven to 180°C and prepare 9″ baking dish (greased and floured).

In an electric mixer, whip butter and sugar until fluffy. Mix in the eggs and egg yolks one at a time adding the vanilla with the last egg yolk.

Add the flour and baking powder in small amounts, alternating with the milk and pineapple juice, mixing on low speed until the batter is well combined, scraping down sides and bottom of the bowl after each addition. Bake for 35-45 minutes or until a wooden skewer comes out clean.

pineapple cake

Let it cool for at least one hour. Meantime lets prepare the frosting.

  • 3 cups heavy cream
  • 1 cup powdered sugar
  • 1 cup cream cheese (left at room temperature)
  • 1/2 tsp vanilla extract

In the bowl of the electric mixer, whip the heavy cream until soft peaks form. Add 1/3 of the powdered sugar and whip until stiff peaks form or your cream will be runny when decorating. Scrape into a separate bowl to whip the cream cheese with the remaining 2/3 cup powdered sugar and vanilla. Fold the mixture in the whipping cream.

Now the cake is ready to be decorated. You will need 300g of pineapple chunks (caned) for the stuffing. Divide the cake in two layers, drizzle from the juice of the pineapple can on both layers for a moist texture before putting the cream and pineapple chunks. Cover the whole cake with the remaining cream.

pineapple cakeTo make it look festive and up to the occasion i decorated the top with fresh pineapple, looking like flowers. It’s very easy to make them, follow the fool proof scheme step by step :

pineapple flower DIY

Slice off the top and bottom of the pineapple and peel it. Pop out the seeds on the sides. Slice the pineapple very thinly so that the slices are almost translucent. Lay them on a baking sheet lined with a parchment paper.  Bake at 150°C to dry them out slowly.  Timing will vary, i worked with a baby pineapple so i didn’t need more than 10 minutes before i transfer them to a muffin tin so that the edges curve upward in the shape of a flower. I let them sit to cool  this way to retain the flower shape.

pineapple cakeAdd some of the pineapple stems to give it a realistic look.  Enjoy the heavenly taste of this mouthwatering cake.

pineapple cakeIf you like this post give it some likes and shares to spread the joy. Don’t forget to like marmite et ponpon facebook page and follow on twitter. More interesting posts are yet to come.

Volcanic eruptions and rainbow lava experiment – My Little Scientist


Volcanic eruptions and colorful lava experimentArt and science come together in this fun and colorful experiment. This activity comes together with just 3 ingredients and no preparation;  In a brown cup (close to look like a real volcano) we put roughly 1 cup of baking soda with few drops of food coloring, then we poured the vinegar, enough to start seeing the eruptions (due to acid – base reaction).

Volcanic eruptions and rainbow lava experimentTo get those colorful ripples, looking like a rainbow, we were adding the food coloring one after the other while the volcano was erupting.

Volcanic eruptions and rainbow lava experimentWe started with green, yellow and blue, first all together then one at a time to get like earth colors ripples, and ended it with the red orange to look like a real volcano!.Every time we were adding a color, Nady was pouring more vinegar to get more and more eruptions. We did many until there was no more vinegar left at home 🙂

Volcanic eruptions and rainbow lava experimentVolcanic eruptions and rainbow lava experimentStunning right? Nady and I were in awe!! Don’t hesitate to try this experiment, it’s absolutely safe (The chemicals produced are non-toxic), easy and so much fun.

Volcanic eruptions and rainbow lava experimentVolcanic eruptions and rainbow lava experimentIf you like this post give it some likes and shares to spread the joy. Don’t forget to like marmite et ponpon facebook page and follow on twitter. More interesting posts are yet to come.

Color changing flowers experiment – My Little Scientist


Color changing flowers experimentThis experiment is a great lesson of “patience” to give to your children, of course beside teaching them about flowers and osmosis. But before going that deep let me tell you it’s also a great fun for the whole family!

Very easy set up; begin by filling the vases with water and desired colors. We used roses and daisies for the experiment.  Give a fresh cut to the flowers before placing them in the colored water, it helps for a quicker absorption.

Color changing flowers experimentColor changing flowers experimentAs the flowers drink the colored water, they will start changing colors (due to osmosis effect, in simple words moving water through the stems to make it more comprehensible to your kids as the flowers need to drink). The change won’t start before few hours.

Our first observation was 6 hours later.

Color changing flowers experimentThe roses were more colored than the daisies. Not all flowers react the same. Nady is so into experiences nowadays, he expects to do one every day after school. I am sure he is fascinated with the outcome thinking it’s magic more than science. I don’t blame him, i would like to believe so also, it brings more fun to the experiment 🙂

Color changing flowers experimentColor changing flowers experimentEach time we go back to check on the flowers, i don’t hide it, i was even more excited than Nady! And this is how they looked after 24 hours.

Color changing flowers experimentThe red and yellow looked amazing! the slowest was purple, so we eliminate it, Nady thought it wasn’t fun 🙂 Don’t do that maybe yours will work!

Color changing flowers experimentColor changing flowers experimentAfter each observation, Nady wants to take pictures with his magical flowers. Then we put them back each in their corresponding vase.

Honestly i was very impressed with his patience, personally i wasn’t. It was a good exercise for me too.

Last observation was 48 hours later. Here are our beautiful flowers!!

Color changing flowers experimentColor changing flowers experimentColor changing flowers experimentColor changing flowers experimentColor changing flowers experiment

You can leave the flowers in the water as much as you want, the colors will be certainly brighter. It all depends on the patience of your children.

If you like this post give it some likes and shares to spread the joy. Don’t forget to like marmite et ponpon facebook page and follow on twitter. More interesting posts are yet to come.

Magic milk and swirling colors experiment – My Little Scientist


Magic milk and exploding colors experimentIt’s one of the awesome science experiments that will wow your kids and turn out to an art project. A perfect mix of science, art and fun. All you need is milk, liquid food coloring and dish soap to see the colors moving and swirling into amazing patterns.

Pour the milk in a shallow container, add few drops of many colors and dip a q-tip in liquid dish soap, ask your kid to poke the food coloring and let the magic start!

Magic milk and exploding colors experimentThe reaction of the soap disrupting the surface tension of the milk causes the colors to radiate away from the q-tip ( In simple terms, the soap breaks apart the molecules of fats and proteins in the milk and he chases them trying to join with them). The more you poke the colors the more patterns you get! it was really spectacular. We did this experience so many times that we finished all the milk we had at home. Who cares! i love the face of my kid when he is super happy and exploring new things.Magic milk and exploding colors experiment

His reaction was priceless, couldn’t stop the experiment, i was enjoying as much as he did. He asked to repeat it 10 times!!!

Magic milk and exploding colors experimentand each time we were getting more beautiful patterns!

Magic milk and exploding colors experiment

Magic milk and exploding colors experimentAnd to make it a real art project we transferred the patterns on papers to get beautiful piece of art.

Magic milk and exploding colors experimentMagic milk and exploding colors experimentIt was a fun way to explore and learn. I cherish the time with my kid and invite all the parents to play with theirs and enjoy this priceless quality time. I can’t wait until Joud becomes the age when he can join his brother to our playtime.

These are Nady’s chef d’oeuvre;

Magic milk and exploding colors experimentMagic milk and exploding colors experiment

Magic milk and exploding colors experimentMagic milk and exploding colors experimentIf you like this post give it some likes and shares to spread the joy. Don’t forget to like marmite et ponpon facebook page and follow on twitter. More interesting posts are yet to come.

A lip smacking beef stroganoff


beef stroganoffWhat a flavorsome savory dish that will grace your table and leave you with enjoyment and comfort. So quick that can be prepared by the time of boiling your tagliatelle. I can promise to soothe your hunger in less than 30 minutes!

It’s a classic russian dish with many variations. My recipe calls for:

  • 500g lean beef strips
  • 1 big onion finely diced
  • 100g butter
  • 2 tbsp flour
  • 1 1/2 cup beef broth (or water)
  • 1 tbsp mustard
  • 1/3 cup wine
  • 200g mushroom
  • 1/2 cup heavy cream
  • salt to taste

In a large skillet over medium heat, melt the butter and cook the onions slowly until tender (3-4 minutes) , then add the beef strips and  brown (3-5 minutes) stirring constantly. Sift in the flour and cook for another 2 minutes. Pour in the broth (or water) along with the mustard and wine. Let it simmer together for 10 minutes. Finally add the mushroom and cream to cook for 5 minutes all together.

beef stroganoffServe on a bed of tagliatelle or rice. Some people likes it with roasted potatoes too. Sprinkle with chives or parsley and wow your family/guests. I promise you lots of murmuring between them and a another visit sooner than you think.

Having baby Joud with long nights deprived of sleep and living the experience of brotherhood and first year of school for Nady make us need this type of comfort food. I can say at this stage and where we live, good food is the enjoyment for my husband and I.

beef stroganoffIf you like this post give it some likes and shares to spread the joy. Don’t forget to like marmite et ponpon facebook page and follow on twitter. More interesting posts are yet to come.