Category Archives: special occasions

Create memories that will last – Christmas photo booth


christmas photo booth

Beautiful moments deserve beautiful photos. Create memories that will make you smile for long with this cute Christmas photo booth.

Last year we enjoyed the props so much, this i wanted something different with the same enjoyment we had before. A photo booth to unite the whole family in one picture.

christmas photo boothIt’s a 120x100cm frame printed on foam board to have the necessary thickness. Click on photo booth to download the printable file. It’s a vector one, easy to make changes on it to fit your desire.

christmas photo boothCherish and preserve your memories, a picture is worth a thousand word. Happy holiday to everyone, Jesus is born!

christmas photo booth


christmas photo boothI will upload later our photo booth pictures from the Christmas eve.

If you like this post give it some likes and shares to spread the joy. Don’t forget to like marmite et ponpon facebook page and follow on twitter. More interesting posts are yet to come.


Deck the table with these 5 dazzling hors d’oeuvres


broccoli christmas tree appetizerGet your Christmas dinner start with these beautiful and easy first course. These relish 5 appetizers takes less than 10 minutes to prepare and bring the wow factor to your Christmas table.

This amuse bouche made with broccoli and cherry tomato is inspired from the Christmas tree. Serve it with cocktail or ranch sauce.

CAPRESE skewersNo forks or spoons required for these easy-to-pick-up appetizers; Caprese skewers can replace a salad.

cheese snowmanA snowman cheese is an impressive hors d’oeuvre, so cute to be eaten. You can prepare it with any white creamy cheese you like; feta, boursin, rambol, goat cheese….

feta cheese tomatoGo beyond a cheese board with these cute feta thyme appetizer. The tomato hat made all the difference 🙂

kebbe ginger manKebbeh is a staple on the Lebanese table, take it to the next level by cutting it into Christmassy shapes like ginger man, tree, star, snowflake, snowman….Kids will love it too.

If you like this post give it some likes and shares to spread the joy. Don’t forget to like marmite et ponpon facebook page and follow on twitter. More interesting posts are yet to come.

Superhero cake tutorial – Happy birthday Nady!


super hero cake tutorialMy little hero, a huge fan of superheroes (i guess like all boys of his age) turned three couple of days ago. He definitely fancy a superhero cake, but since he was hesitant which character to choose, i decided to surprise him and merge 4 in 1 cake; spiderman, captain america, batman, and hulk.

I am an amateur baker and self tutor, learning how to work with fondant and dress up a cake like professionals. I put all my heart to decorate this cake to be up to my son’s expectations. I would love one day when he looks back at his old pictures to be proud of this mom. So far i succeeded to do it over three years for his 3 consecutive birthdays. I wish him million cakes of happiness and good health!

super hero cake tutorial

This superhero cake looks complicated to do but if you follow me step by step you will find it’s not that hard.

  • First you need to cover the cake with 4 colors of fondant in equal parts; green for hulk, yellow for batman, white for captain america and red for spiderman.
  • To start with spiderman, you need to draw the web with chocolate or icing. Start by vertical lines then do the horizontal ones, each one like a semi circle.
  • super hero cake tutorial
  • For the eyes all you need to do is trace them on the fondant and cut out. Click here for a high resolution file for the eyes. It’s a vector one you can adjust the size according to your cake.
  • super hero cake tutorial
  • Captain america is super easy, to do his shield, start with a red circle, than a smaller one white, then a smaller one red and a final smaller one blue. Put on top a white star and decorate around the shield with blue small stars.
  • super hero cake tutorial
  • Batman is the easiest i guess. All you need is tracing the logo on black fondant and cut it out. Click here to download a high resolution file to use it as a stencil. It’s a vector file to be able to adjust to the convenient size of your cake.
  • Finally hulk, the part that needs the most work. First cut small irregular shapes to look like a wall when put together.
  • super hero cake tutorial
  • To do the hand, you need to make 4 green cylinders (fingers) and put them on a rectangular shape. Here you need to look at your real fist to try modeling the fondant the nearest possible to real one.
  • super hero cake tutorialtry when bending the cylinder shapes to do fingers, create the knots, nails and do small lines to look like flesh, these details will make it look real. If you don’t have the real tools for modeling you can use a knife.

Et voila the homemade superhero cake! Always add your personal touch, it adds more love and gives the occasion the warmth needed. happy birthday super Nady!

super hero cake tutorialIf you like this post give it some likes and shares to spread the joy. Don’t forget to like marmite et ponpon facebook page and follow on twitter. More interesting posts are yet to come.

Divine Christmas chocolate cookie


Christmas chocolate sugar cookie
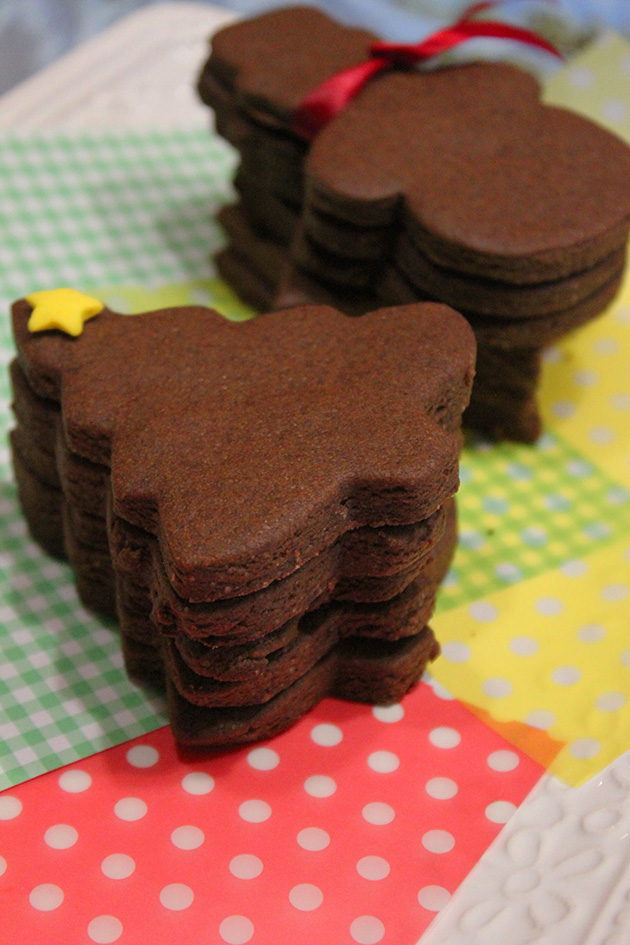
Baking holiday desserts is the most enjoyable thing to do; if you’re not in the festivities mood yet, the smell filling the house when baking these chocolate sugar cookies will do the job!

These melt in your mouth cookies will be the hit for this year and a staple for the coming years. You can consider it as a homemade gift to family and friends.

Christmas chocolate sugar cookie This recipe makes a pretty large batch, about 4 1/2 dozens to enjoy (of course it could be plus or minus depending on the cutters size). The most important is to use a good quality of cocoa because it’s all about the chocolate taste.

The recipe calls for:

  • 400g butter unsalted and softened
  • 2 cups sugar
  • 4 1/2 cup all purpose flour sifted
  • 1 1/2 cup cocoa powder sifted
  • 2 large eggs
  • 1 tsp salt
  • 2 tsp vanilla

Cream the butter and sugar together in the bowl of an electric mixer on low to medium speed. Add eggs slowly and mix. Make sure to scrape down the bowl with your spatula and mix again. Add vanilla extract and stir briefly.

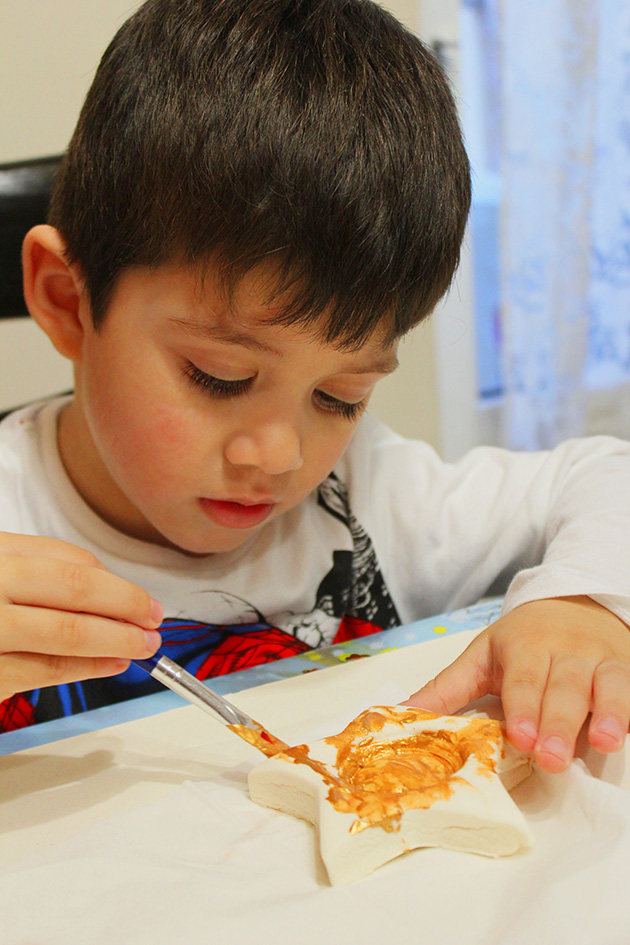
Sift your dry ingredients together. (Flour, cocoa powder and salt) then add them to the mixture. Mix on low speed, when it clumps around the paddle attachment it’s ready. It’s also important at this stage not to over mix the dough. Place in the fridge for a minimum of 1 hour. Roll out the dough and cut out cookie shapes.

christmas chocolate sugar cookies

Preheat your oven to 180°C. Bake cookies for 8-12 minutes or until the center of the cookie no longer looks wet. Again the baking time will depend on the size of your cookie.

When baking cookies, I usually line the baking tray with parchment paper, it helps cookies to bake evenly and it’s easy to slide the cookies off of the baking sheet without breaking them. Let cookies cool to room temperature then serve.

christmas chocolate sugar cookieschristmas chocolate sugar cookiesThis is my first batch, lets see how many more i will be doing before Christmas is here. Happy baking!

You can also check last year’s scrumptious Christmas shortbread cookies.

christmas chocolate sugar cookiesIf you like this post give it some likes and shares to spread the joy. Don’t forget to like marmite et ponpon facebook page and follow on twitter. More interesting posts are yet to come.


Christmas candle holder -DIY- crafts for tiny hands


christmas candle holder - DIYChristmas decoration fiesta is still going on. My little Lutin is so excited and counting down to the big day D. Meantime we are enjoying crafting some decorations to add our personal touch in every corner in the house.

I really loved working with the baking soda dough that we explored this year. Last week we did the keepsake ornaments and the result was amazing, so we decided to use it again for candle holders. For a reminder to the dough recipe, click here.

christmas candle holder - DIYCut out star shapes and while the dough is still soft, mark the place of the tea candle before baking. When it’s totally dry and cool, hand it to your little helper and watch the lovely golden fingers coloring them. Red, green and golden are the dominant colors in our house for this season.

christmas candle holder - DIYchristmas candle holder - DIYI am amazed how dedicated Nady is. I love Christmas more and more because of his excitement, to the extent i feel like a kid again and i believe in Santa 🙂

After the paint is perfectly dry, place the tea candles. We used vanilla scented ones because we are planning to light them the Christmas eve at the dinner.

christmas candle holder - DIYLike i always say, personalized things are the most meaningful. I am sure these candle holders will remain for many coming christmases.

If you are doing this with your little girls, add glitter on the paint they will love it. Little details make the difference. Always give options to your kids to develop their creativity.

christmas candle holder - DIYIf you like this post give it some likes and shares to spread the joy. Don’t forget to like marmite et ponpon facebook page and follow on twitter. More interesting posts are yet to come.