Category Archives: design

Let the world know… (along with a free printable)


Print

Let the world know my bundle of love is here, welcome my son Joud to our warm nest. My family is growing and so is my heart!

Now i have two boys, Nady and Joud, the eyes i see the world through.

Now i have grown two wings, and i am ready to fly… with you Antoun lets conquer the world!

welcome joud

I wanted to share with you our happiness and a free printable welcome door signage. If you like it, all you need is changing the name or size, i’ve attached to you a high resolution file, (vector) that you can edit easily!

Click here to download the file.

If you like this post give it some likes and shares to spread the joy. Don’t forget to like marmite et ponpon facebook page and follow on twitter. More interesting posts are yet to come.


3 fun games to teach your toddler the geometric shapes and colors (free printables)


shape cards

Teaching your child about shapes and colors is greatly important. This knowledge manifests in their daily life. It helps:

  • Improving the verbal communication: by providing them the exact descriptive vocabulary we are offering an opportunity to communicate more effectively. By that we avoid their frustration of being unable to ask for a specific thing. ex: “i want the blue car not the red”, “i like the square biscuit more than the round one”…
  • Building up the logic skills: do you know that when your kid is able to build a balanced lego tower, means he is making use of his geometry skills?
  • Improving pre-reading skills: Children will apply the same skills that they used in recognizing circles and squares to recognizing and naming all of the letters, as letters are just more complicated shapes.
  • Being creative: the knowledge of shapes and colors will help them to create what they imagine in their minds when drawing or creating shapes with playdough….  Also the use of colors can express feelings and emotions that young children may not have the words to describe. Ex: using the color red to express anger.
  • Teaching perspective: realizing that shapes not only exist in flat form on paper but as objects in everyday life, will give them a new perspective of their surroundings.

First comes recognizing the shapes and then drawing, tracing or coloring them is a plus. And maybe building 3D shapes in an advanced stage.

12 cards

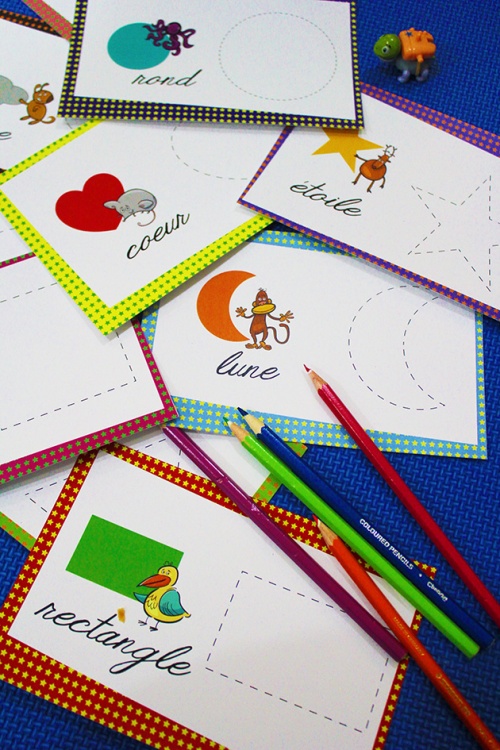
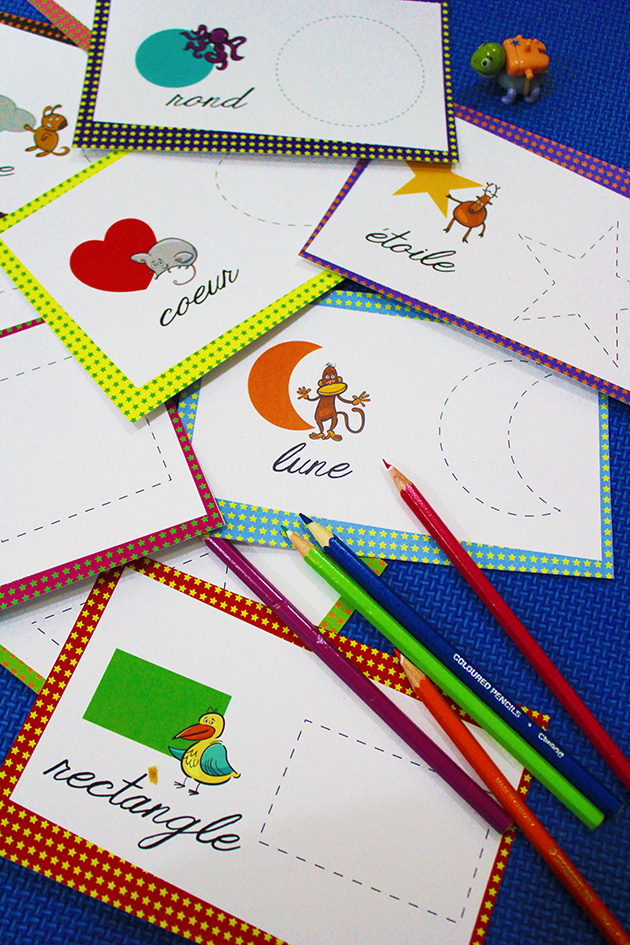
I created series of cards for the most common shapes that a child will encounter in his daily life (square, rectangle, circle, oval, triangle, heart, star…..). Total of 12 colorful shapes with animals, to make it more fun. This way we are learning shapes, colors and animals.

Click on french cards  or english cards to download a high resolution file.

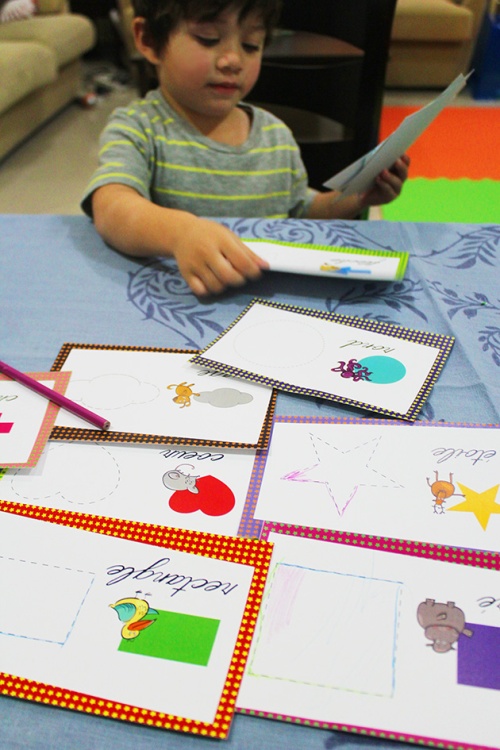
As Nady loves singing, we were spending time on each animal to sing a related song and name its benefits.

We played 3 games with these cards:

Game 1: Tracing the shapes with colored pencils

tracing the shapes

A smart way to enhance his motor skills and practice the pre-writing ability by learning how to hold the pen and draw, beside naming the colors and the animals

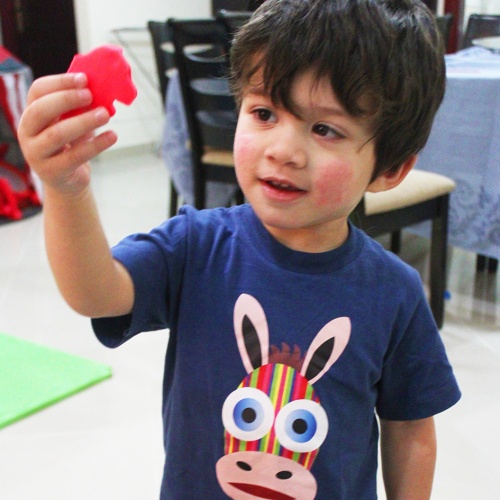
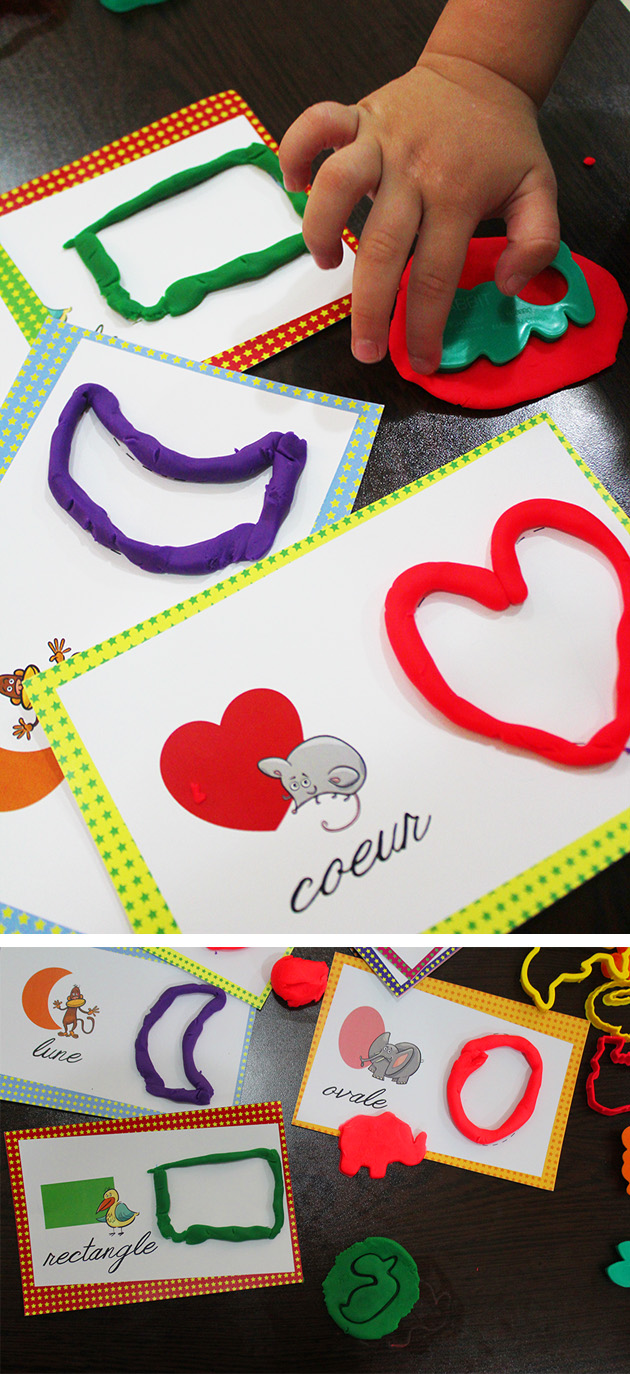
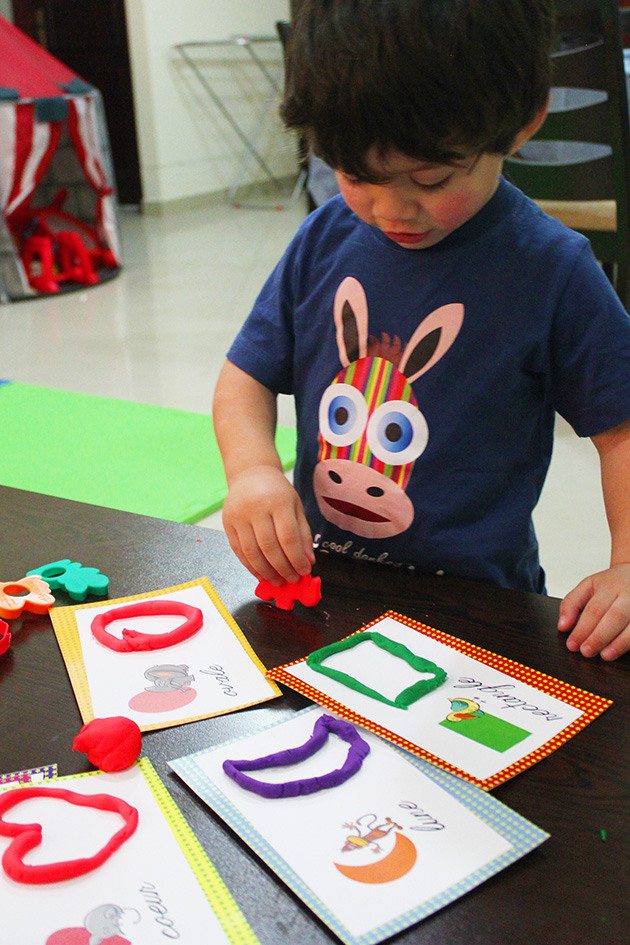
Game 2: Making the shapes out of playdough

playdough tracing 1

playdough tracing 2

This game couldn’t end without using the cutters! The favorite activity of Nady 🙂 We found a way to make it beneficial, by cutting same animals to make assimilation!

playdough tracing 3

A great way to build fine motor skills while the child rolls out the dough to trace around the shapes while learning the shapes, colors and animals.

Game 3: Coloring inside the lines

coloring

A different type of exercise, teaching a tough skill that needs time, drawing inside the lines! My son is a reluctant artist, he doesn’t like to follow rules he wants to be a free!  Without forgetting that this exercise aims also to learn shapes, colors and animals.

We had a new experience each time we played with those cards. The sky is the limit. You can create your own games depending on what is your aim from the exercise.

Don’t forget playing and having fun is very educational! Enjoy every moment with your children, they are precious.

IMG_4971

IMG_4972

This is what i call a way to play! If you like this post give it some likes and shares to spread the fun. Don’t forget to like marmite et ponpon facebook page and follow on twitter. More interesting posts are yet to come.


Creative Easter eggs decoration -Dinosaurs land- DIY


IMG_4896As i always say, my son is my source of inspiration. He is so much into dinosaurs lately, so a NADYnosaurs land is the perfect idea for this year’s Easter eggs.

As promised in previous post and If you’re willing to recreate this dino park, follow me step by step in this tutorial, it’s much easier than you think.

IMG_4801To make the dinosaurs eggs, you need first to dye the hard boiled eggs with a color of your choice. To marblize the dyed eggs (to give the effect of real dino ones), add a tbsp of olive oil to another color, preferably darker, then dip them in and let sit about 2 minutes before you pat dry.

I always recommend wilton coloring gel for healthy results.  Add vinegar to your colors for vibrant effect.

IMG_4842We tried as well with brownish colors to make it as real as possible!

IMG_4843For the Dinosaurs, click here to download a high resolution file of the tail, back and head to stick on the eggs.

IMG_4845For the Nadynosaur banner, click here to download the file, you can easily change the name on it.

IMG_4852 IMG_4855 IMG_4858 IMG_4859

The biggest the park you want, the more eggs you should decorate. The files i attached present 3 color options of the dinosaurs; blue, green and orange. You can change easily to your favorite ones (vector files). Enjoy the best moments with your kids. Nothing better than seeing their happy faces! Just priceless!

IMG_4884 IMG_4885 IMG_4886

Happy Easter everyone. المسيح قام، حقاً قام

IMG_4892 IMG_4895

If you like this post give it some likes and shares to spread the joy. Don’t forget to like marmite et ponpon facebook page and follow on twitter. More interesting posts are yet to come.

Easter/spring burlap door wreath


IMG_4525The second item falling in the burlap decoration series, a colorful door wreath! Last year we did buttons made bunny, we had to remove it after Easter which made Nady a bit disappointed. This year our door decoration is more springy to keep it longer!

Cut a big circle of styrofoam then a smaller one within to make it look like a hoop. Wrap it with burlap and here it is, ready to decorate with pinwheels and flowers done with your sweetheart’s tiny hands with so much enthusiasm and love!

All you need is felt and burlap cut in squares and glued back to back. This is how we do pinwheels, step by step.

how to do a pinwheel flowerDepending on the size, you decide how many pinwheels to do. We made 3 different sizes and colors, as per Nady choice. He was the leader of the craft and i was following his instructions.

spring wreathInitially i prepared for only pinwheels, but he asked to add flowers, specifically green, yellow and purple 🙂

Click on flowers to download a high resolution file to help you trace them before cutting.

IMG_4521

Such activities develop your child’s motor skills while having fun cutting, pasting, folding, drawing, tracing, and coloring. . .  These are big skills for tiny hands. It’s beautiful to see your children growing and being proud of their achievements!

“i can paste”! don’t undermine this sentence. Motor skills enable your child to perform important everyday tasks, and when combined with hand – eye coordination also open new doors to exploration, learning, and creative expression.

Researches show that emphasis on purely intellectual activities such as memorization of letters and numbers… is far less useful at this stage than encouraging fine motor abilities and hand-eye coordination. These skills lay the foundation for academic learning in later years. In order to learn to write or draw, for example, a child’s hand must be strong enough to hold a pencil steady for a long period of time.

The best way for you to help promote motor skills is to provide your child with a good choice of materials (blocks, crayons, nontoxic and washable markers and paints, paste, glue, modeling clay, safety scissors…) to manipulate as his imagination dictates.

IMG_4524We played a bit with the wreath before mounting it on the door. That was the best part; my precious is exploring the different usages of it 🙂

IMG_4527IMG_4531

This is what i call a way to play! If you like this post give it some likes and shares to spread the joy. Don’t forget to like marmite et ponpon facebook page and follow on twitter. More posts yet to come, stay tuned!

Napkin folding Easter bunny


IMG_4579Setting the table for special occasions makes it more special. Folding the napkin in a cute bunny shape improves the table adornments if you are willing to organize Easter lunch at your home.

Follow this step by step tutorial to know how to transform a flat sheet into a 3D shape Easter bunny.

how to fold napkin as bunny

Et voila the lovely bunny!

IMG_4584

I am sure this cute bunny can energize any Easter table! You don’t have to be an origami master, all you need is enthusiasm. If you have kids, include them in this fun activity and teach them about Easter while playing 🙂

IMG_4581If you like this post give it some likes and shares to spread the joy. Don’t forget to like marmite et ponpon facebook page and follow on twitter. More interesting posts are yet to come, stay tuned!